VPC Lattice: yet another connectivity option or a game-changer?
12 April 2024 - 4 min. read
Damiano Giorgi
DevOps Engineer


Continuous Deployment is nowadays a well-known strategy for releasing software where any commit that passes the automated testing phase is automatically released into the production deployment.
With Continuous Deployment, companies can eliminate DIY for Continuous Delivery and increase the focus on the product, make deployments frictionless without compromising security, and creating a flawless workflow across development, testing, and production environments.
In our last article, we talked about Microservices, their benefits, and how to set up a Blue/Green Deployment on AWS for an ECS Service.
Blue/Green Deployment is a technique where both the old infrastructure (blue) and the new temporary infrastructure (green) co-exist. Once a new version is installed, it is possible to carry out integration/validation tests on the green infrastructure before promoting it to production. If so, the traffic switch can be done with virtually no downtime.
This time we want to take another step forward from our last article and, as promised, show how to make the process automatic, by defining a pipeline for Continuous Deployment to manage the entire release flow.In short, from a simple git push, we want to release the new software package in Blue/Green mode through an ECS service.
In the end, we’ll also propose to you two bonus sections: how to automate testing on green environments and how it is possible to skip some initial infrastructure’s boilerplate creation thanks to AWS CloudFormation.
Are you ready? Let’s dig in!
Before start preparing your pipeline some steps must be done in order to have everything in place, ready to be configured to your needs:
Note: following are simplified steps to cover the last prerequisite; for more in-depth instructions, follow the steps provided in our previous article.
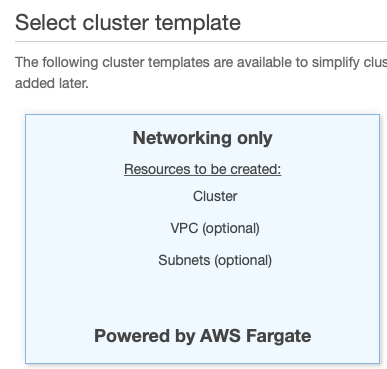
Go to your AWS account, select ECS in the search bar and after that click on “Clusters” in the left panel and “Create Cluster” in the new window. Leave “Networking only” as an option since we want to use Fargate and click “next”.
Type your cluster name, leave all settings as default and finally add some meaningful tags if you want. Click “Create” to generate a new blank cluster.
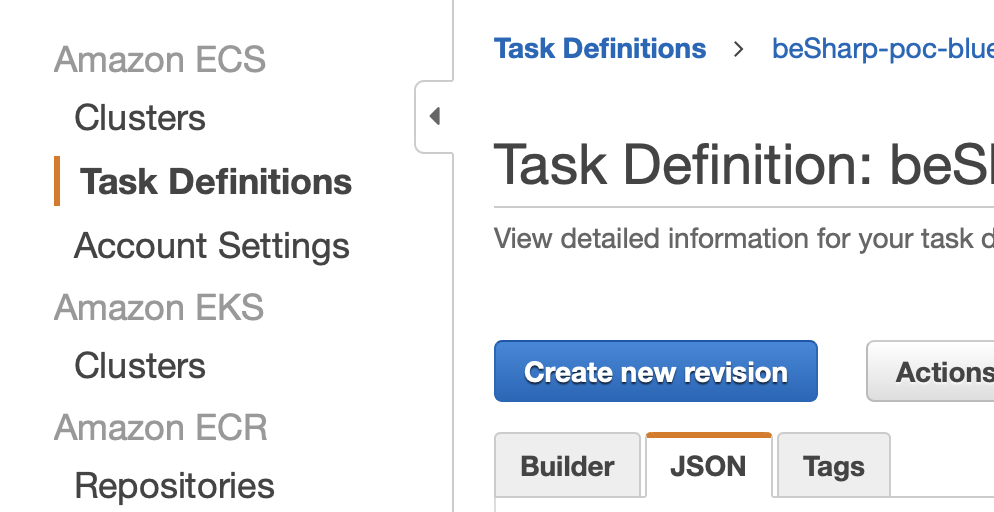
Another prerequisite is the Task Definition, which will host our Docker containers.
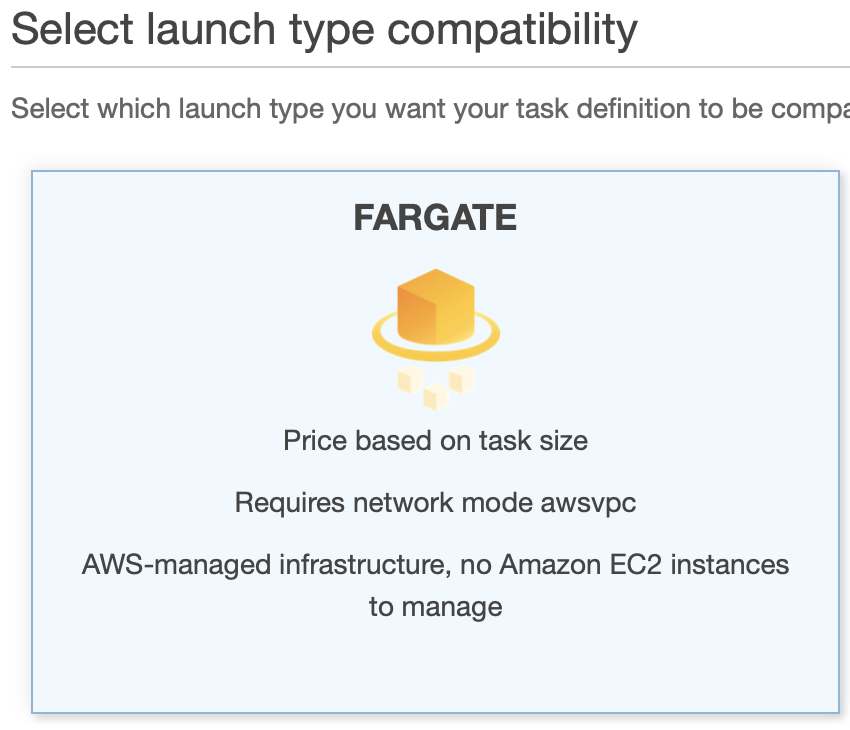
Go to “Task Definitions” under “Amazon ECS” menu, then click “Create new Task Definition” and select “Fargate” as the image below and click “Next Step”:
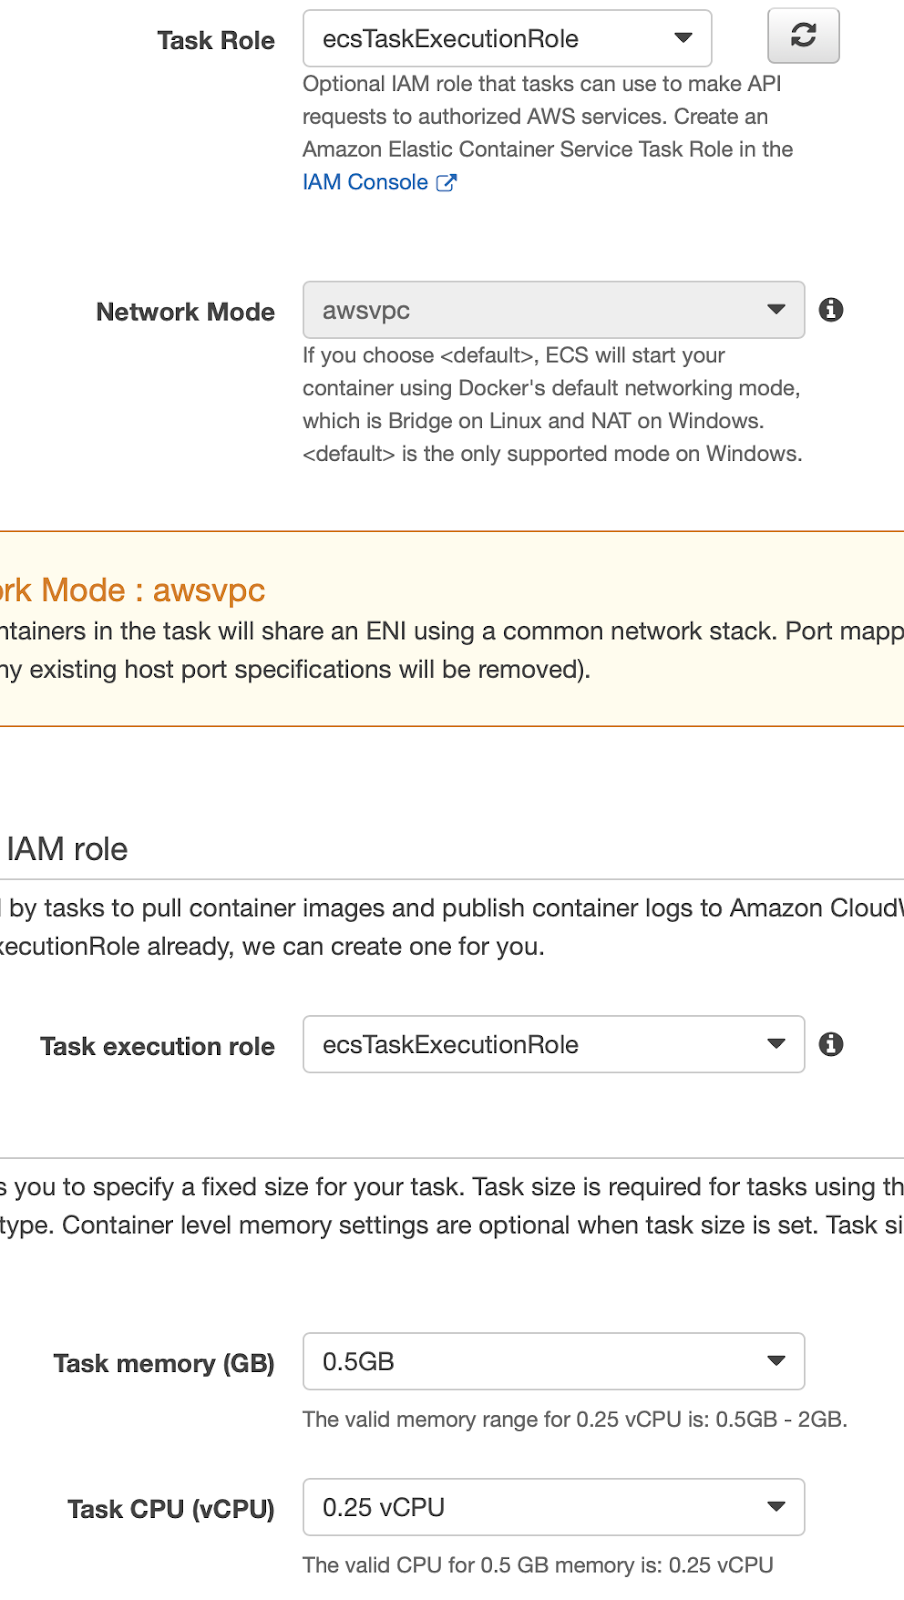
For now, we can assign the default roles to both the Task Role and the Task Execution Role since they are sufficient for the operations we have to perform. Select the minimum values for Memory and Cpu (0.5GB and 0.25vCPU for this example).
We then create a container and associate it with the Docker image, previously saved on ECR (see the last article), appropriately configuring the vCPU and the memory with the same values as our task definition.
Select “Add Container”.
A sidebar will open. Set a name for the container and for the Image Uri, open a new Tab, and navigate to ECR dashboard, select your previously created image and copy its URI value. Assign the value to “Image URI”.

Then add 3000 for tpc protocol in “Port mapping”, leave all other parameters as default and click “Add”. Finally, save your task definition with “Create”.
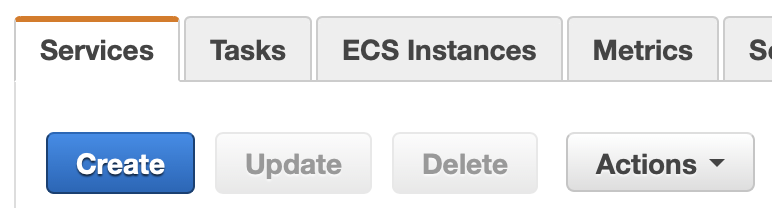
Start by going to your created Cluster in ECS service, click on its name and in the bottom area of the dashboard, under the “Service” tab, click “Create”.
In the new area, configure the options as following:
1. Launch Type: FARGATE
2. Task Definition: <YOUR_TASK_DEFINITION>
3. Cluster: <YOUR_CLUSTER>
4. Service Name: <A_NAME_FOR_THE_SERVICE>
5. Number of Tasks: 1
6. Deployment Type: Blue/Green
7. Deployment Configuration: CodeDeployDefault.ECSAllAtOnce
8. Service Role for CodeDeploy: <A_SUITABLE_ROLE_WITH_ECS_PERMISSIONS>
Leave the rest of the options as default and click “Next Step”. In the new section select a suitable VPC, one or more of its subnets and auto-assign IP enabled.
Then we need to configure an Application LoadBalancer for our cluster. Select an existing one or create a new one from the EC2 console. Then select your container, being sure that it shows your mapped port.
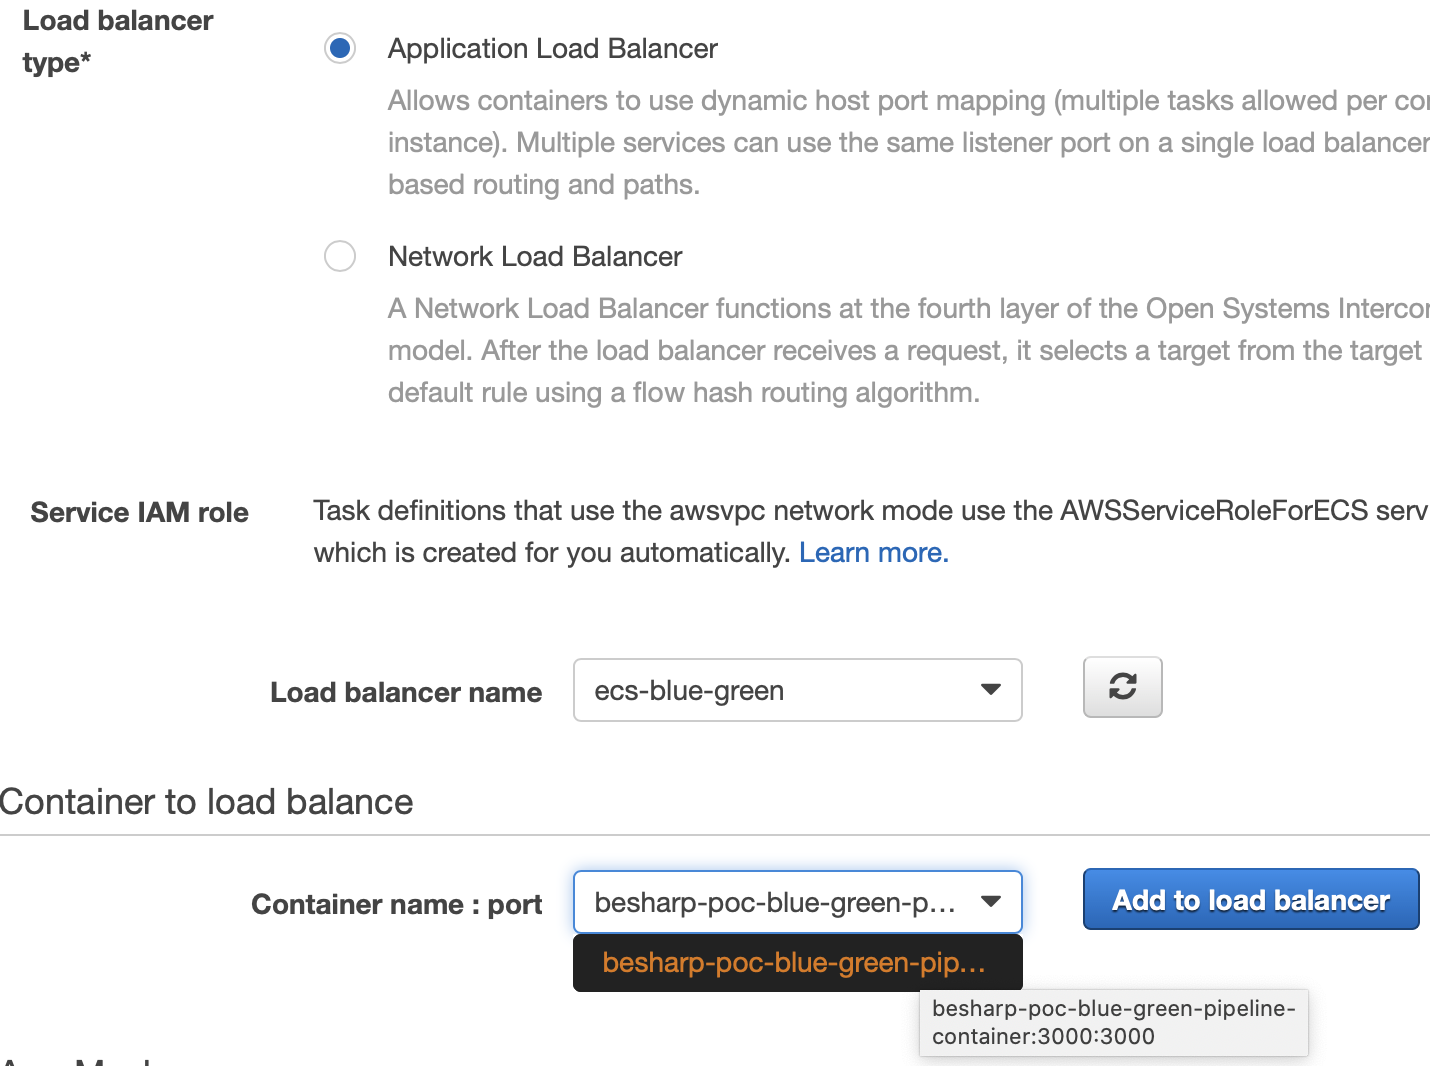
After selecting your container click “Add to load balancer”.
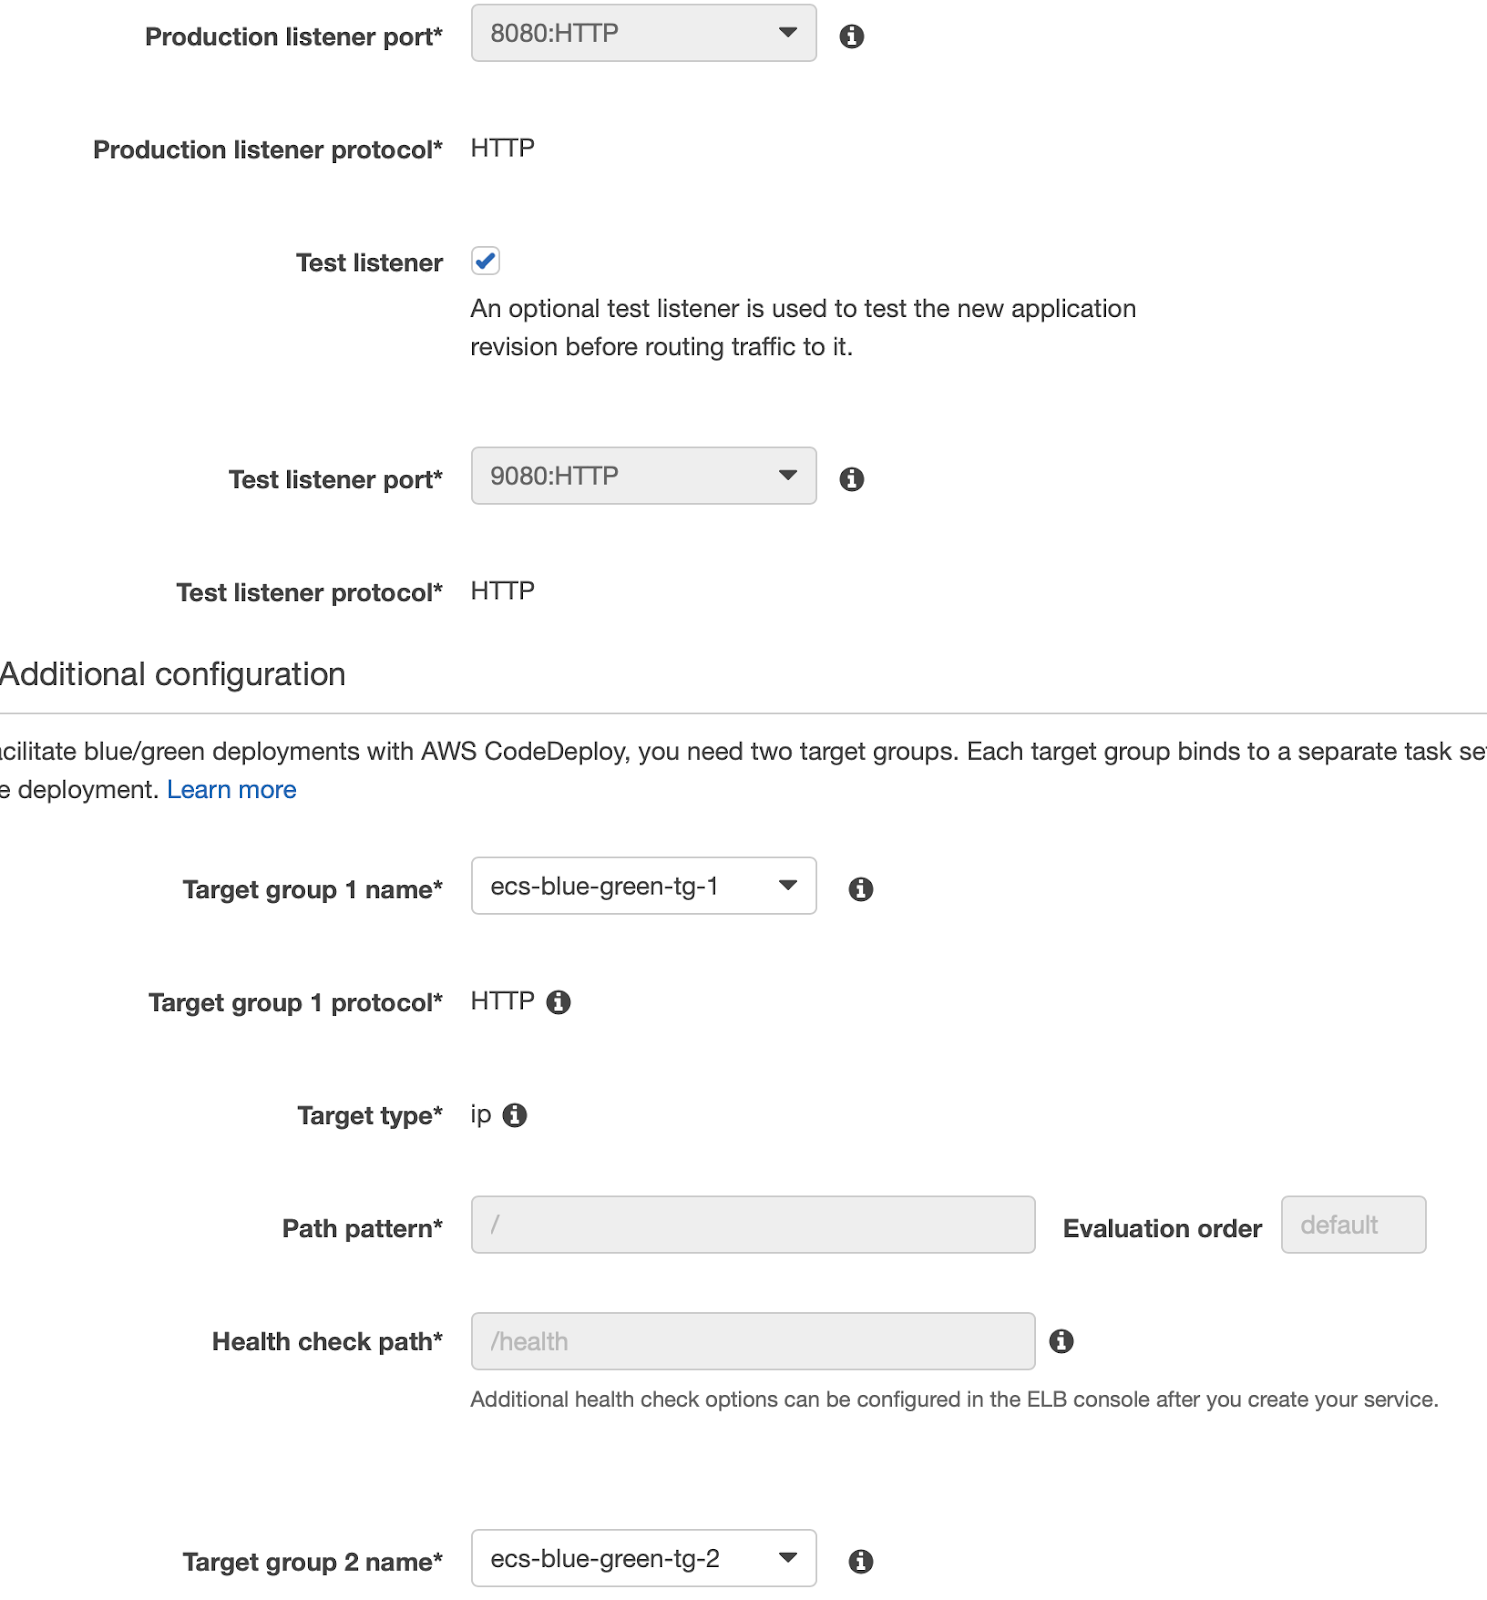
Select 8080 for “Production Listener Port” and 8090 for “Test Listener Port”, select your LoadBalancer’s target group as shown in figure (you’ll have to configure them beforehand or now in another tab following this guide.
After that, you can go to the next step and leave autoscaling off (for this example). Finally, after the review check, your service will be created!
Now we have all the fundamental bricks to create the Pipeline process in CodePipeline. Let’s move on!
Start by having your sample application pushed on your GitHub repository.
Go to your AWS Account, select AWS CodePipeline from the services list. From the dashboard click on “Create pipeline”.

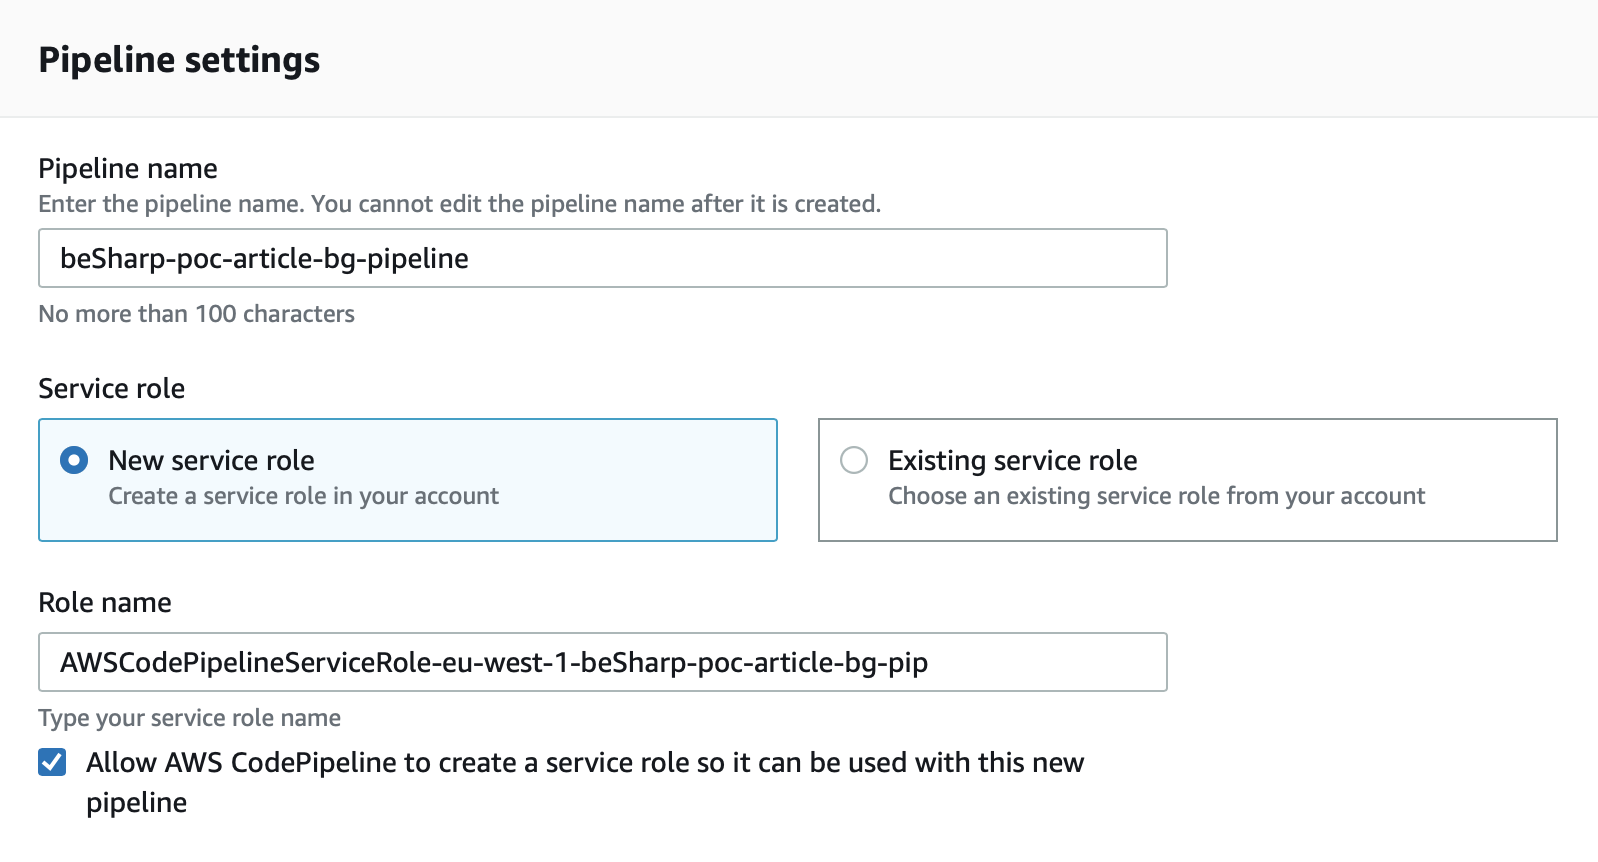
In the next screen give a name to your pipeline and if you don’t already have a suitable role, leave “New service role” checked and the other options as defaults; click “next”.
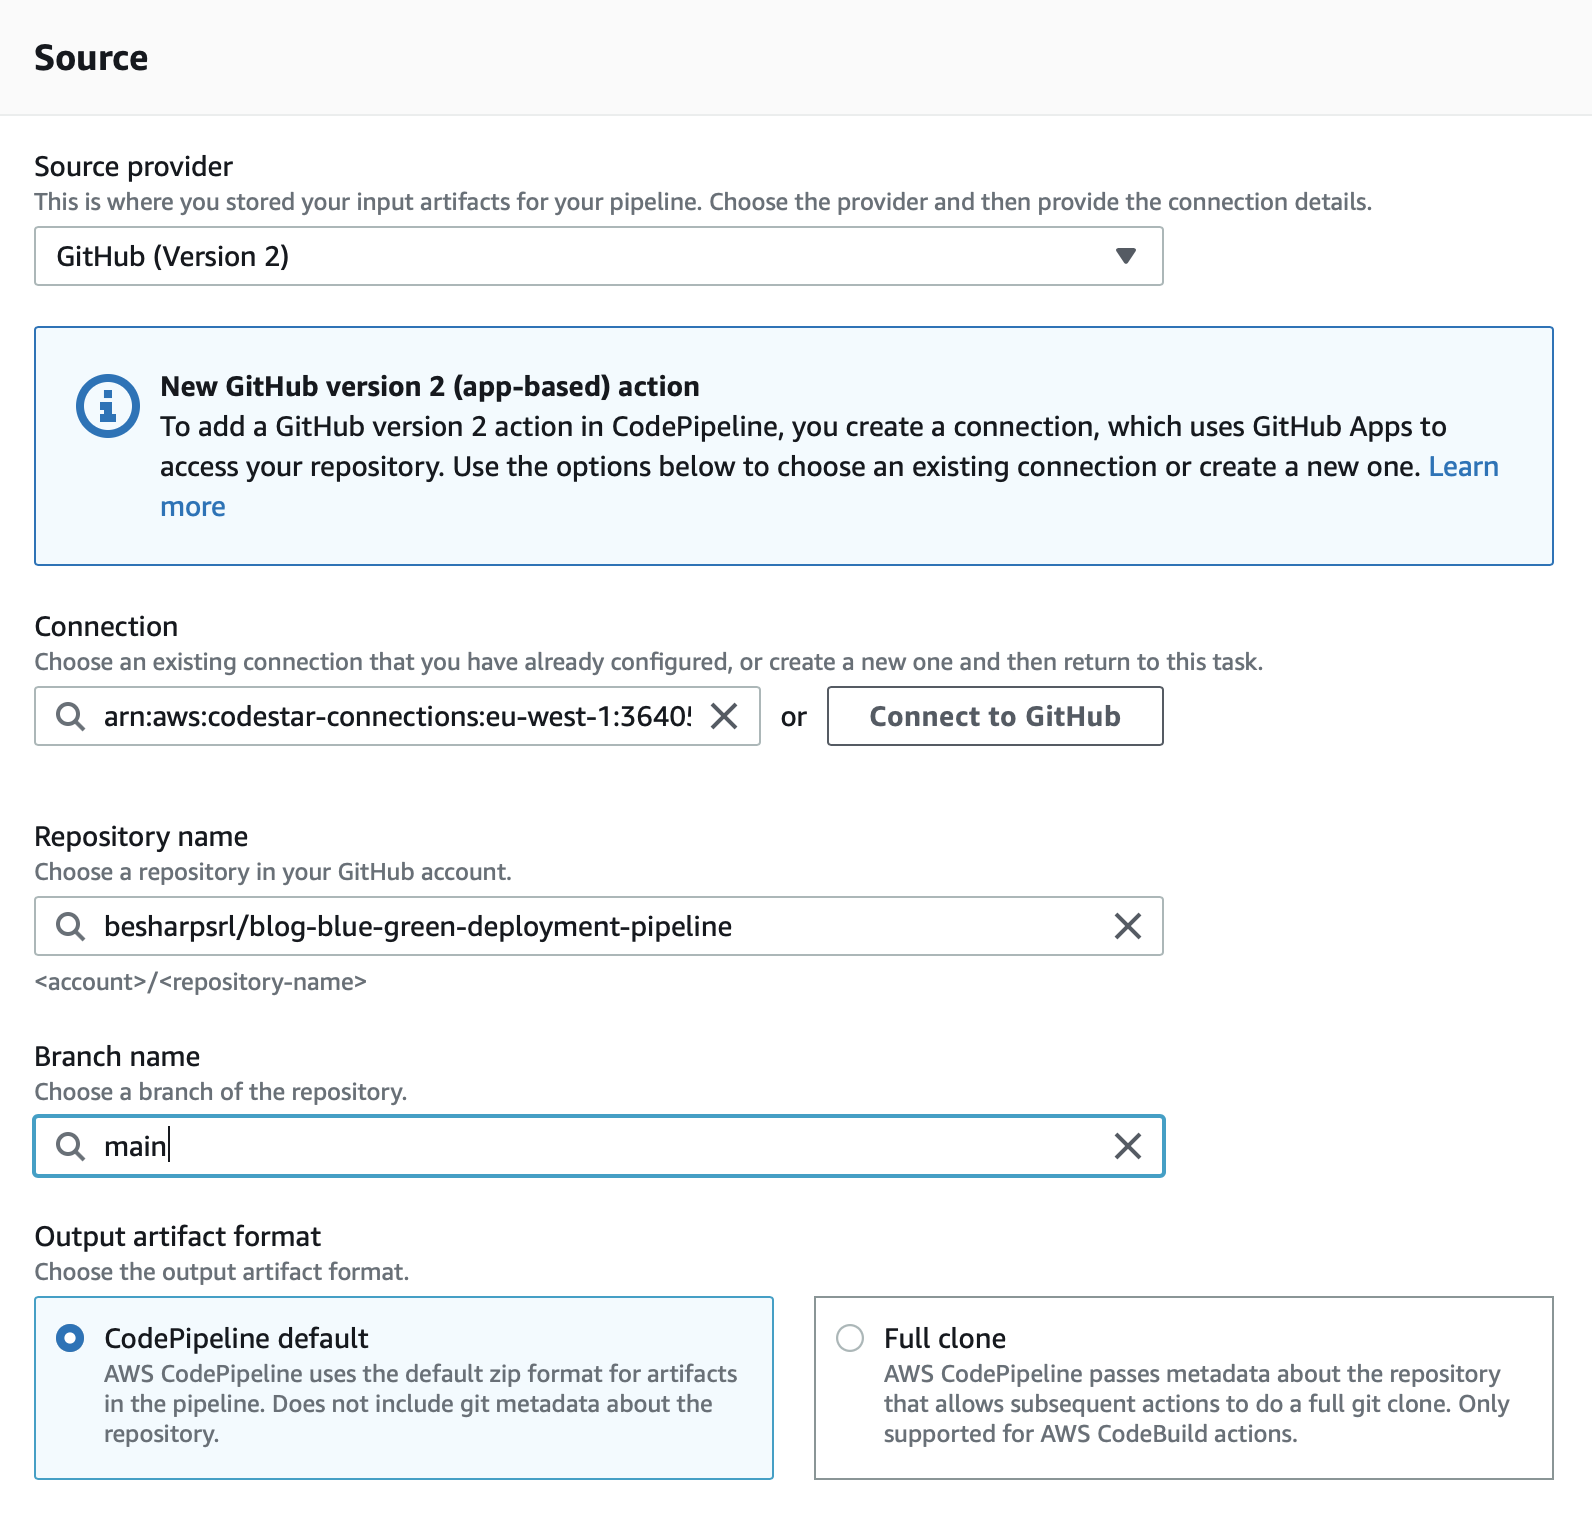
In the source stage select “GitHub version 2” and then you have to connect to your GitHub repository. Please follow the instructions provided after clicking on “Connect to GitHub”. Remember to authorize only the repository of your solution and to be the owner of that repo, otherwise you won’t be able to complete the process.
After being connected to GitHub, you’ll be able to complete the stage as follows, setting repository and branch:
Click “next”, and you’ll be presented with the build stage where we need to create our CodeDeploy project to add to the pipeline.
In order to keep your code always up to date in the pipeline, you need to make this step to always generate an updated docker image for your codebase.
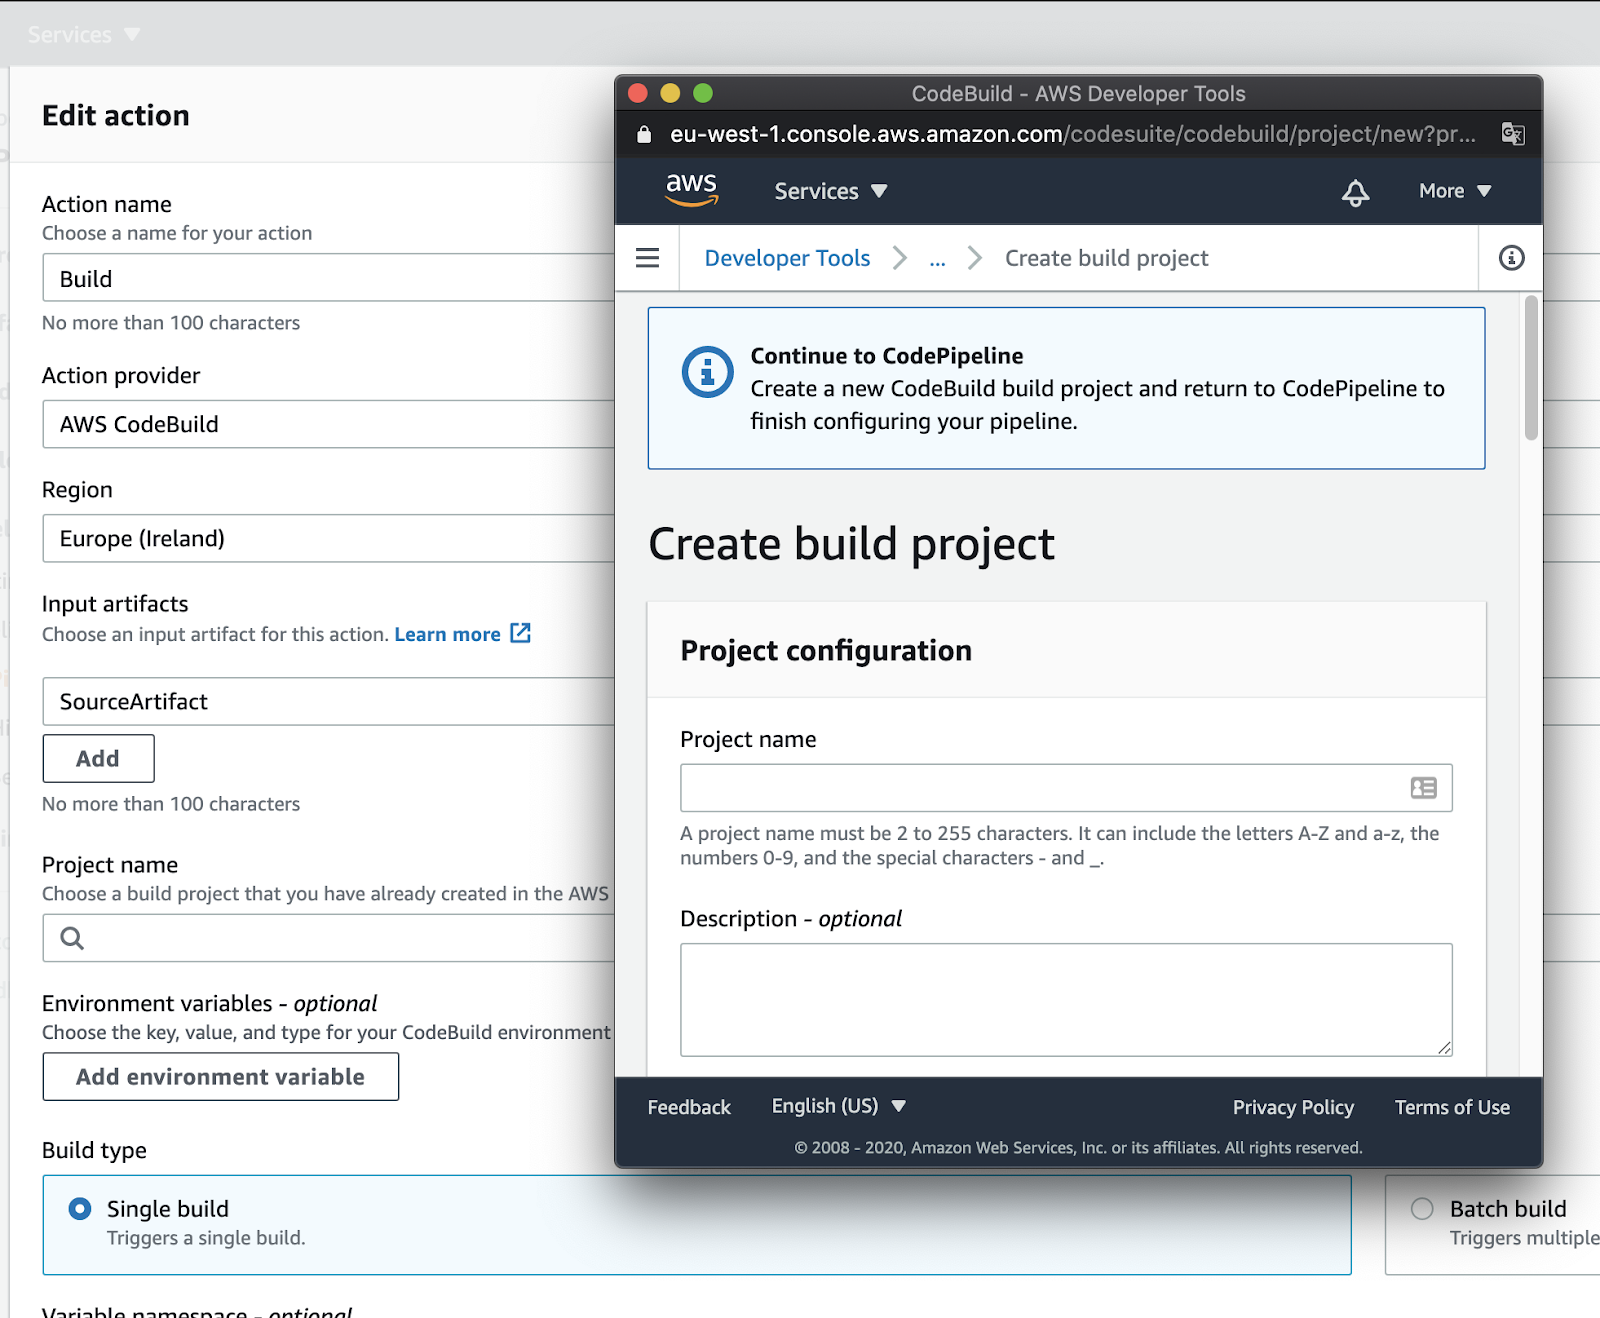
Start by giving a name to your Build stage, select CodeBuild as the “Action provider”, the region, and SourceArtifact as the “Input Artifact”.
Then you need to create a new build project. Clicking on “Add project” will bring a screen similar to this:
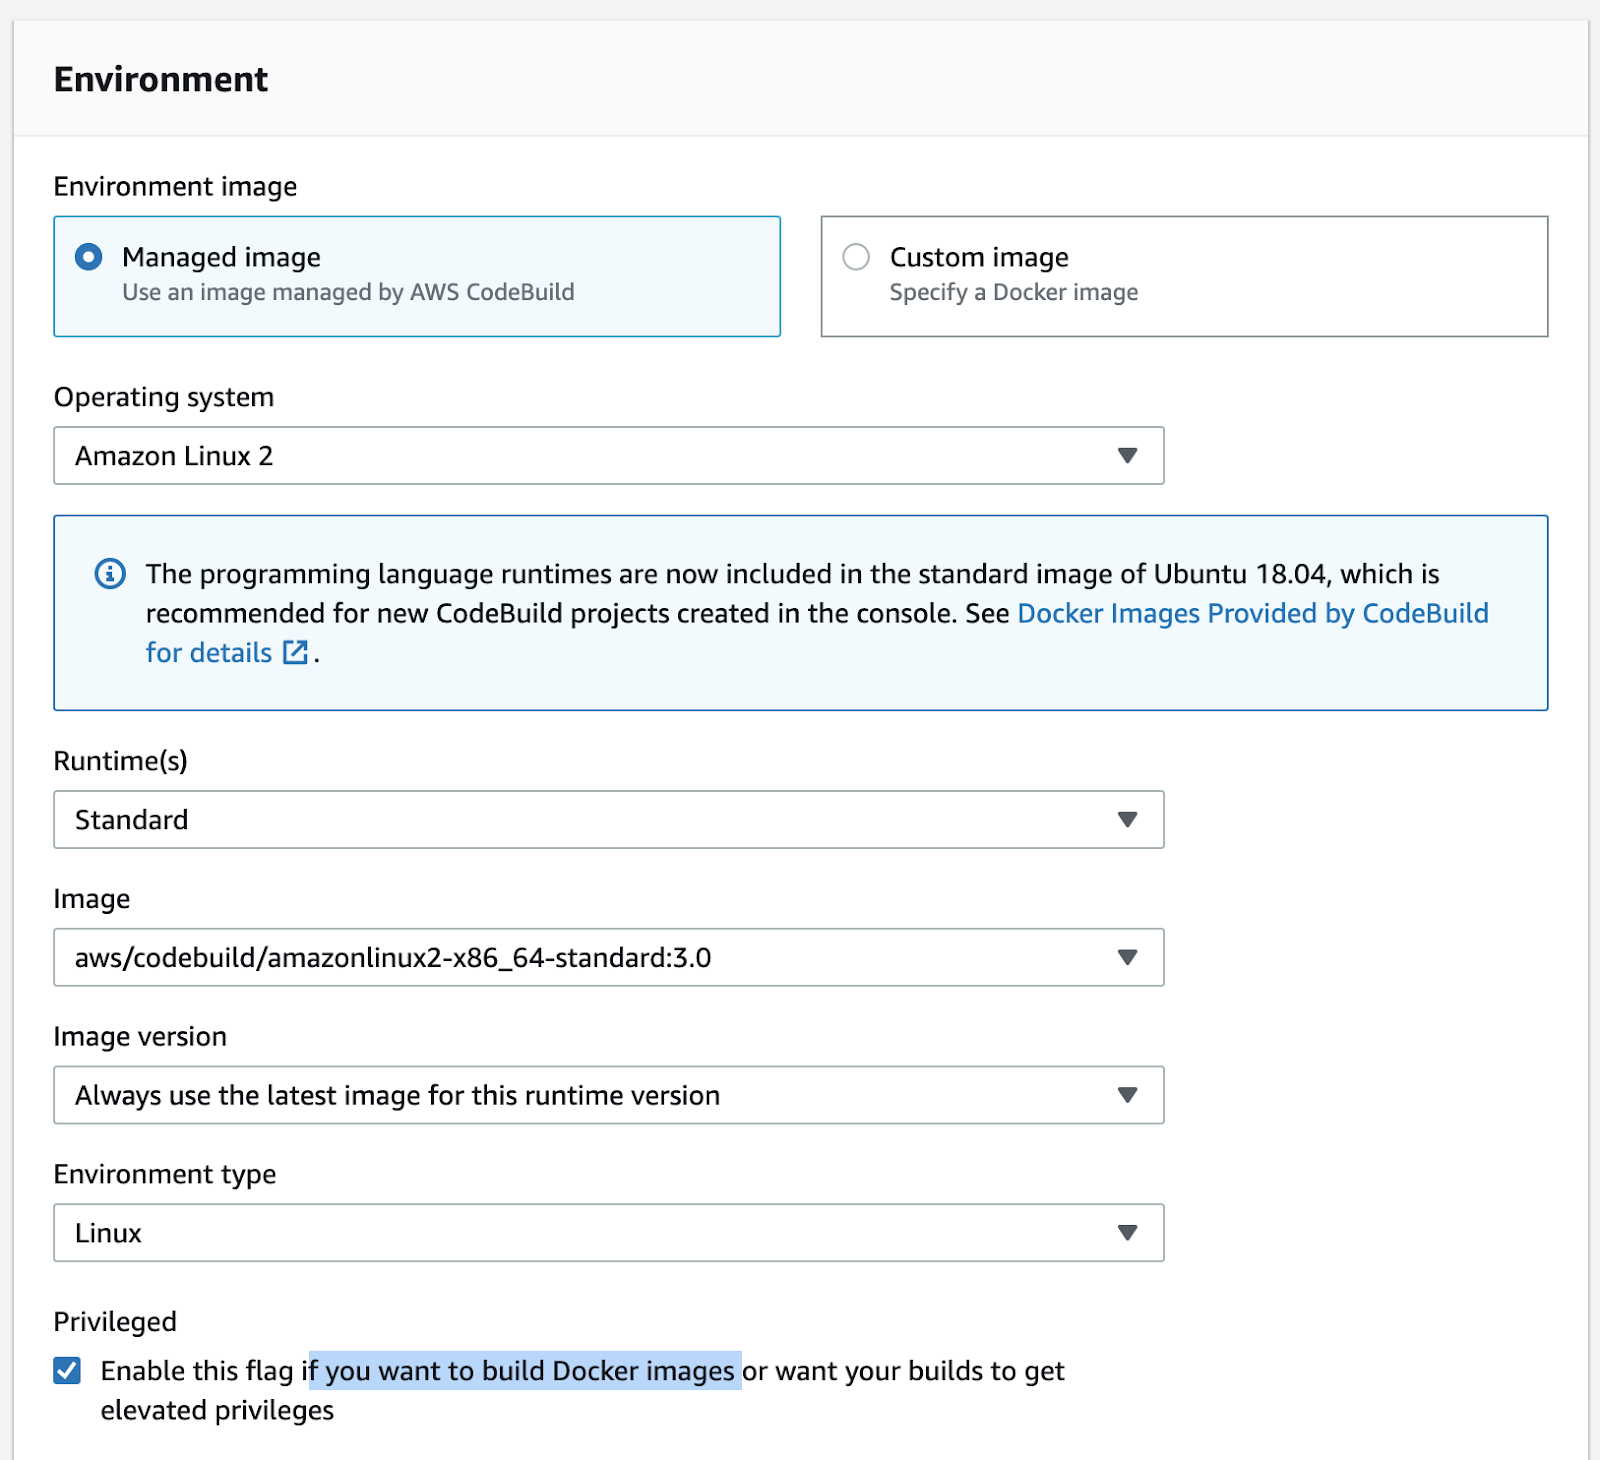
Give a name to the project, then leave Managed Image with all the container properties as suggested, then check (this is very important) the “Privileged option” in order to allow building your docker image. Check your settings with the image below:

For the buildspec option, select the inline editor and paste these commands:
version: 0.2
phases:
 pre_build:
   commands:
     - REPOSITORY_URI=YOU_ECR_URI
     - echo $CODEBUILD_RESOLVED_SOURCE_VERSION      - COMMIT_HASH=$(echo $CODEBUILD_RESOLVED_SOURCE_VERSION)
     - IMAGE_TAG=${COMMIT_HASH}:latest
     - $(aws ecr get-login --no-include-email --region YOUR_REGION)
 install:
   runtime-versions:
     java: corretto11
 build:
   commands:
   - printf '{"ImageURI":"%s"}' $REPOSITORY_URI:latest > imageDetail.json
   - docker build -t YOU_ECR_URI:latest .
   - docker push YOU_ECR_URI:latest
artifacts:
files: imageDetail.json
Note: in bold there are the variables you need to customize yourself to your specific project.
After that, click ok, then add this CodeBuild project to your stage.
Start by selecting “Amazon ECS (Blue/Green)” for Deploy provider, a region for your project, and then click on “Create application”.
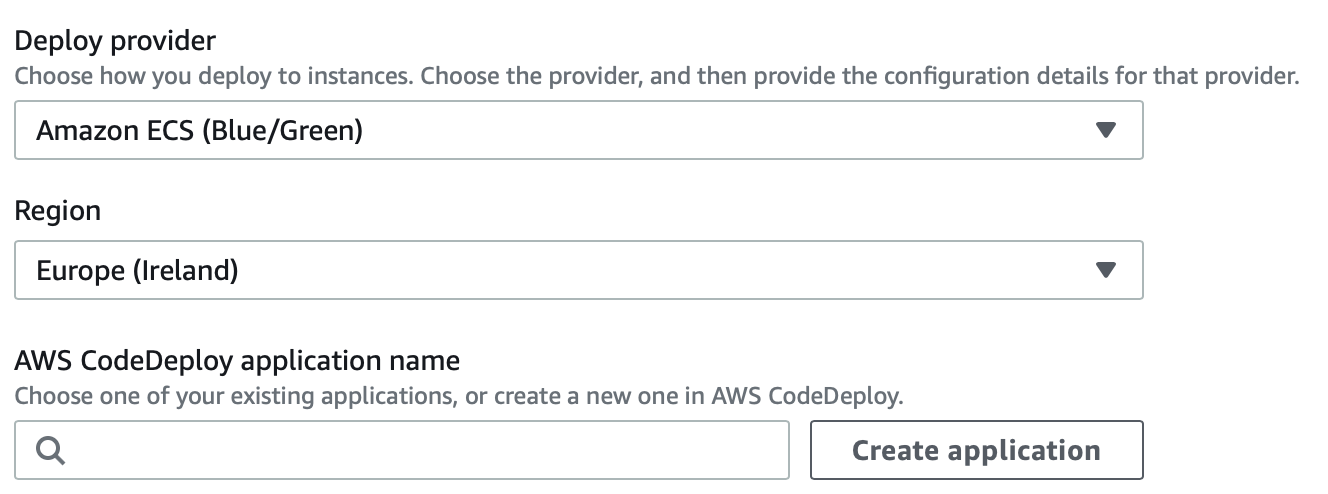
Give a new name to the project and select “Amazon ECS” as a Compute provider. After that, you’ll be presented with a screen for creating a new Deployment group.
Give a name to the Deployment group than select in order:
A service role with suitable access.
The ECS cluster we have created before
The ECS service we have created before
The Application load balancer we have created before with 8080 and TargetGroup 1 for production and 8090 and TargetGroup 2 for test environments respectively.
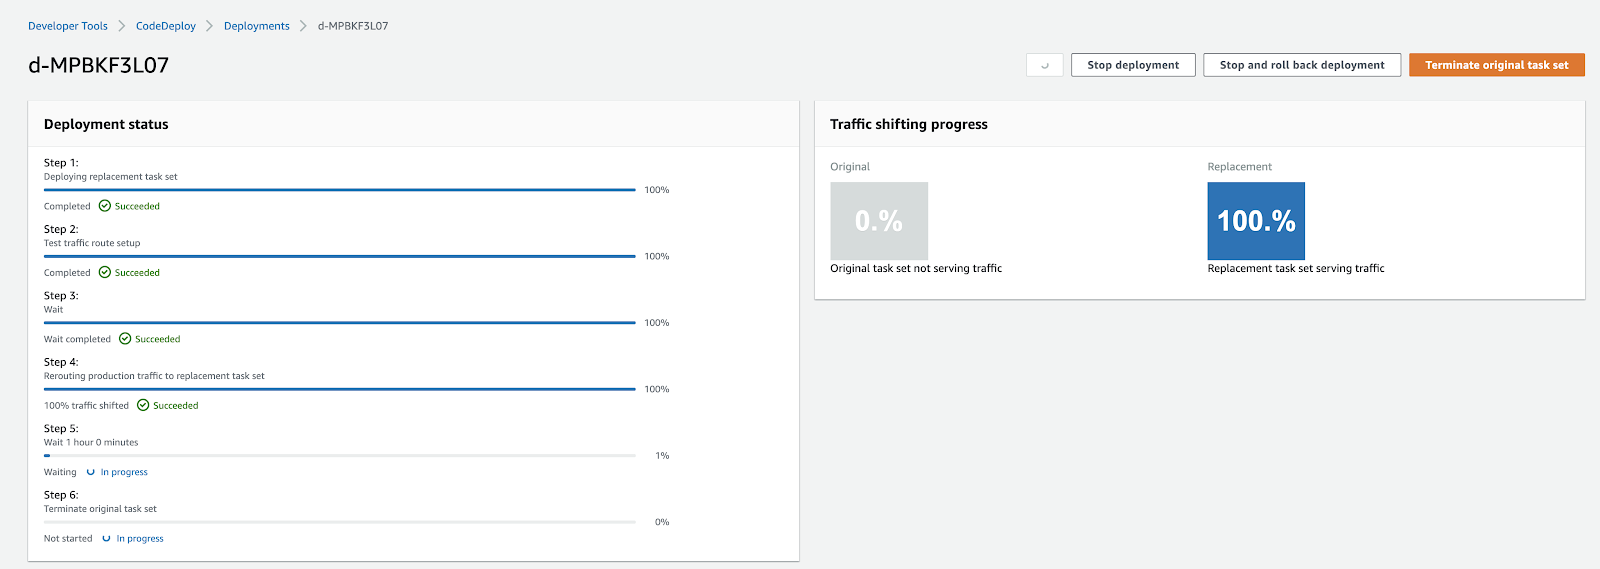
Select a traffic strategy; for this example use “Specify when to reroute traffic” and select five minutes.
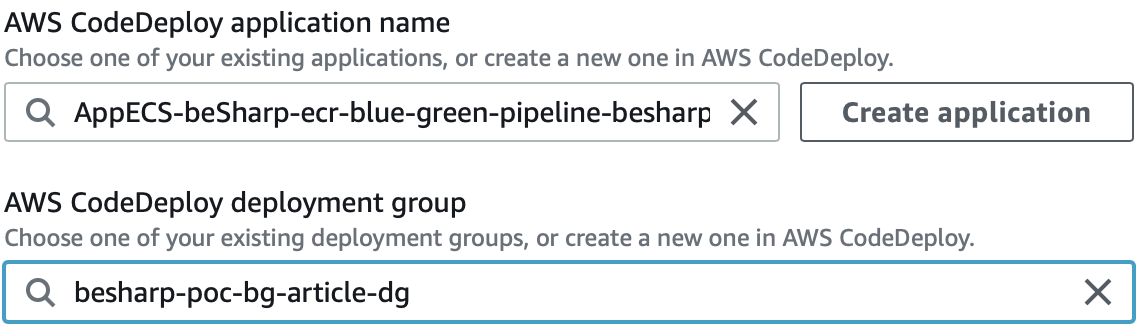
Click “Create” and then return to your CodePipeline stage and select your newly created CodeDeploy application and CodeDeploy deployment group.
Per “Input Artifacts” aggiungiamo BuildArtifact affianco a “SourceArtifact”.
For Amazon ECS task definition and AWS CodeDeploy AppSpec file select “Source Artifact”; then add BuildArtifact and IMAGE as the last options. Click “Next”, review and finally “Create pipeline”.
We are almost there! To complete our pipeline we need to add a task definition and an appspec.yml to our application.
Create a new appspec.yml file in the root of your app’s project and add the following code to it:
version: 0.0
Resources:
 - TargetService:
     Type: AWS::ECS::Service
     Properties:
       TaskDefinition: <task_definition>
       LoadBalancerInfo:
         ContainerName: "YOUR_ECS_CLUSTER_NAME"
         ContainerPort: 3000
For the task definition file we can use a trick:
we have already created a task definition in the prerequisites: go find it and click on “Edit”, you’ll find a JSON editor, copy all text from there and paste it in a new taskdef.json file in the root of your project and change these two lines:
"image": "<IMAGE>"
"taskDefinitionArn": "<TASK_DEFINITION>"
Push everything on your repo.
Test your application before promoting to Production
To verify that all the system is working as expected just make a slight modification to the text on the main route of your application, commit, wait until the pipeline finishes its tasks, and then check your URL with port 8090 and verify that presents the updated version while URL with port 8080 not. Wait for 5-6 minutes and then also the production environment should show the correct new version.
Your pipeline is now fully functional!
Bonus 1: apply automated testing through Lambda on your Green environment
In the deploy phase, it is possible to associate one or more Lambda functions to assert the health and the functionalities of your app before promoting the new version to production. This is done during the configuration of your Deployment lifecycle hooks. You’ll need to add a Lambda hook to AfterAllowTraffic.
Please refer to these guides by AWS to configure this extra touch with a simple test example:
We have checked the prerequisites necessary to create an ECS cluster and its components but as we have seen this section needs a lot of configuration and can be tedious and nonetheless we want it to be repeatable.
Therefore a good idea would be to create a CloudFormation template to automate and simplify the infrastructure creation process.
The following is a simplified snippet to guide you to get started with it.
LoadBalancer:
   Type: AWS::ElasticLoadBalancingV2::LoadBalancer
   Properties:
     Name: !Ref ProjectName
     LoadBalancerAttributes:
       - Key: 'idle_timeout.timeout_seconds'
         Value: '60'
       - Key: 'routing.http2.enabled'
         Value: 'true'
       - Key: 'access_logs.s3.enabled'
         Value: 'true'
       - Key: 'access_logs.s3.prefix'
         Value: loadbalancers
       - Key: 'access_logs.s3.bucket'
         Value: !Ref S3LogsBucketName
       - Key: 'deletion_protection.enabled'
         Value: 'true'
       - Key: 'routing.http.drop_invalid_header_fields.enabled'
         Value: 'true'
     Scheme: internet-facing
     SecurityGroups:
       - !Ref LoadBalancerSecurityGroup
     Subnets:
       - !Ref SubnetPublicAId
       - !Ref SubnetPublicBId
       - !Ref SubnetPublicCId
     Type: application
 HttpListener:
   Type: AWS::ElasticLoadBalancingV2::Listener
   Properties:
     DefaultActions:
       - RedirectConfig:
           Port: '443'
           Protocol: HTTPS
           StatusCode: 'HTTP_301'
         Type: redirect
     LoadBalancerArn: !Ref LoadBalancer
     Port: 80
     Protocol: HTTP
 HttpsListener:
   Type: AWS::ElasticLoadBalancingV2::Listener
   Properties:
     Certificates:
       - CertificateArn: !Ref LoadBalancerCertificateArn
     DefaultActions:
       - Type: forward
         TargetGroupArn: !Ref TargetGroup
     LoadBalancerArn: !Ref LoadBalancer
     Port: 443
     Protocol: HTTPS
 TargetGroup:
   Type: AWS::ElasticLoadBalancingV2::TargetGroup
   Properties:
     Name: !Ref ProjectName
     HealthCheckIntervalSeconds: 30
     HealthCheckPath: !Ref HealthCheckPath
     HealthCheckProtocol: HTTP
     HealthCheckPort: !Ref NginxContainerPort
     HealthCheckTimeoutSeconds: 10
     HealthyThresholdCount: 2
     UnhealthyThresholdCount: 2
     Matcher:
       HttpCode: '200-299'
     Port: 8080
     Protocol: HTTP
     TargetType: ip
     TargetGroupAttributes:
       - Key: deregistration_delay.timeout_seconds
         Value: '30'
     VpcId: !Ref VpcId
 Cluster:
   Type: AWS::ECS::Cluster
   Properties:
     ClusterName: !Ref ProjectName
 Service:
   Type: AWS::ECS::Service
   Properties:
     Cluster: !Ref Cluster
     DeploymentConfiguration:
       MaximumPercent: 200
       MinimumHealthyPercent: 100
     DesiredCount: 3
     HealthCheckGracePeriodSeconds: 60
     LaunchType: FARGATE
     LoadBalancers:
       - ContainerName: ContainerOne
         ContainerPort: !Ref ContainerPort
         TargetGroupArn: !Ref TargetGroup
     NetworkConfiguration:
       AwsvpcConfiguration:
         AssignPublicIp: DISABLED
         SecurityGroups:
           - !Ref ContainerSecurityGroupId
         Subnets:
           - !Ref SubnetPrivateNatAId
           - !Ref SubnetPrivateNatBId
           - !Ref SubnetPrivateNatCId
     ServiceName: !Ref ProjectName
     TaskDefinition: !Ref TaskDefinition
   DependsOn: HttpsListener
 TaskDefinition:
   Type: AWS::ECS::TaskDefinition
   Properties:
     Family: !Ref ProjectName
     ContainerDefinitions:
       - Cpu: 2048
         Image: !Ref ContainerImageUri
         Memory: 4096
         MemoryReservation: 4096
         PortMappings:
           - ContainerPort: !Ref ContainerPort
             Protocol: tcp
         Name: ContainerOne
         LogConfiguration:
           LogDriver: awslogs
           Options:
             awslogs-group: !Ref ContainerLogGroup
             awslogs-region: !Ref AWS::Region
             awslogs-stream-prefix: ContainerOne
     Cpu: '2048'
     Memory: '4096'
     ExecutionRoleArn: !GetAtt ExecutionContainerRole.Arn
     TaskRoleArn: !GetAtt TaskContainerRole.Arn
     NetworkMode: awsvpc
     RequiresCompatibilities:
       - FARGATE
This code is just a hint, you’ll need to cover by yourself parameters’ management and add some tweaks for your specific project. In case of need also refer to these two links:
In this article, we have seen how to create a pipeline to make Blue/Green deployments on ECS completely automated.
We have also seen how Lambda functions can be used to automate the testing phase in the green environment.
To complete our tutorial we’ve also seen how AWS CloudFormation template can be used to minimize boilerplate infrastructure creation as well as making it reusable and repeatable.
As our aim was to trace the path to help you master automation and pipeline setup, this overview was maintained specifically simple, as it is intended to be expanded and manipulated by the reader to fit its particular needs.
Have you ever applied this, or similar – and maybe more advanced - configurations for your Pipelines? Let us know! We can’t wait to hear from you!We hope you enjoyed this reading and found it useful.
As always #Proud2beCloud meets you in two weeks.
Till then, happy deployments :)