
VPC Lattice: yet another connectivity option or a game-changer?
12 April 2024 - 4 min. read
Damiano Giorgi
DevOps Engineer

In these times, delivering support using multiple communication channels is crucial for a business.
There are already big players in the contact center business, but Amazon Connect is an interesting option to evaluate. It's fully managed, easily scalable, and with an aggressive pricing placement on the market.
Every customer has different needs, sometimes leading to unexplored paths in system integration.
In this article, we'll describe a cross-account federation between Amazon Connect, and Azure AD using AWS SSO.
A customer wanted to configure an Amazon Connect instance federating their existing users on Office365 (using the underlying Azure Active Directory service) to keep centralized user management. Another requisite was to have a separate AWS account for the service, to let only some administrators manage services on the account.
Amazon Connect can connect to Active Directory and use it for identity management, but you’ll need to use AWS Directory Service. Sometimes it’s better to leverage existing Identity providers.
AWS SSO was our service of choice because of the flexibility it offers in configuring SAML applications and account access. As a bonus, we also were able to grant different access levels to multiple AWS accounts using single-sign-on.
As you’ll see in this article Amazon Connect doesn’t have a native integration with AWS SSO, so we need to configure an application and use it as an identity provider in the destination account.
In this article, we will:
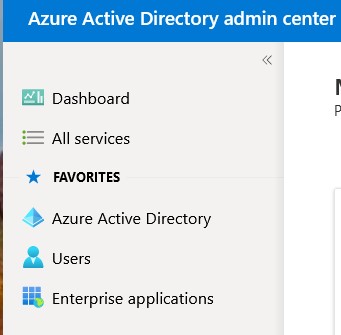
Log into the Azure Active Directory admin center
Select “Enterprise Applications”
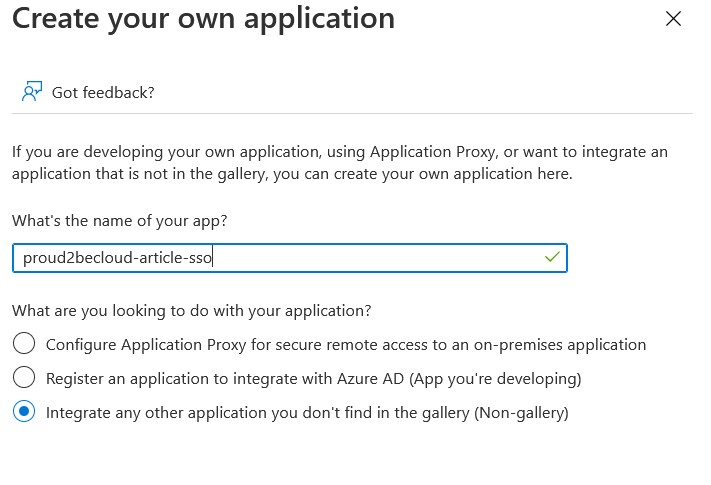
Select “Create your own application” and give it a unique name
After a little while the application will be ready, we need to set-up Single sign-on, click on the menu and then select “SAML”
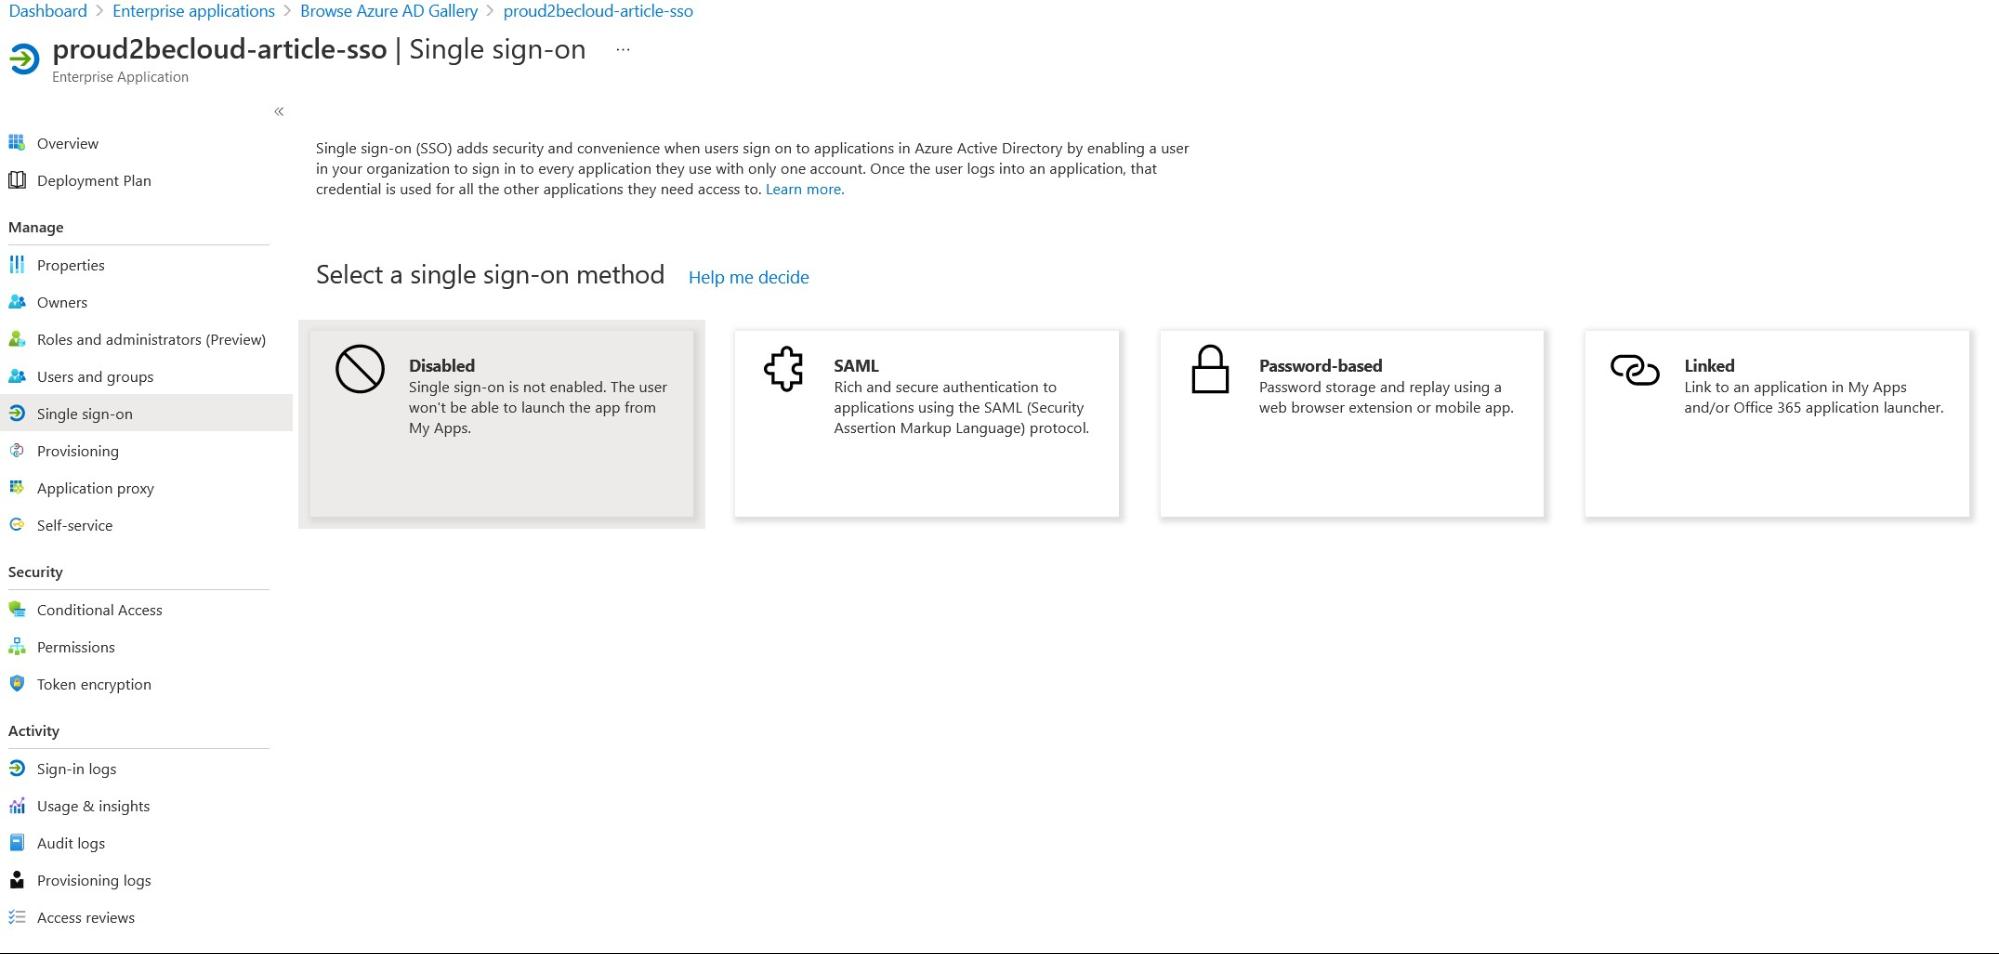
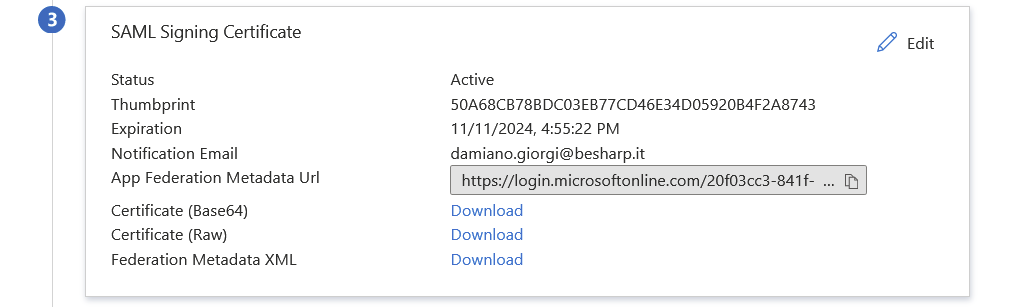
Click on the Download link for “Federation Metadata XML” and store the file in a secure place, don’t share this file with anyone !
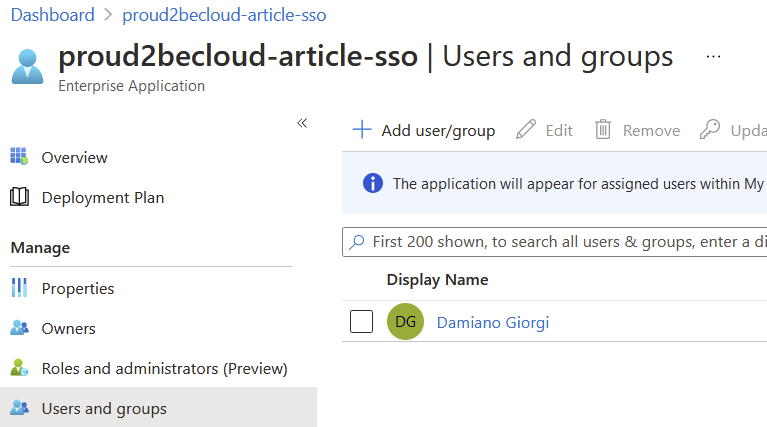
Assign users to the SSO application to enable them
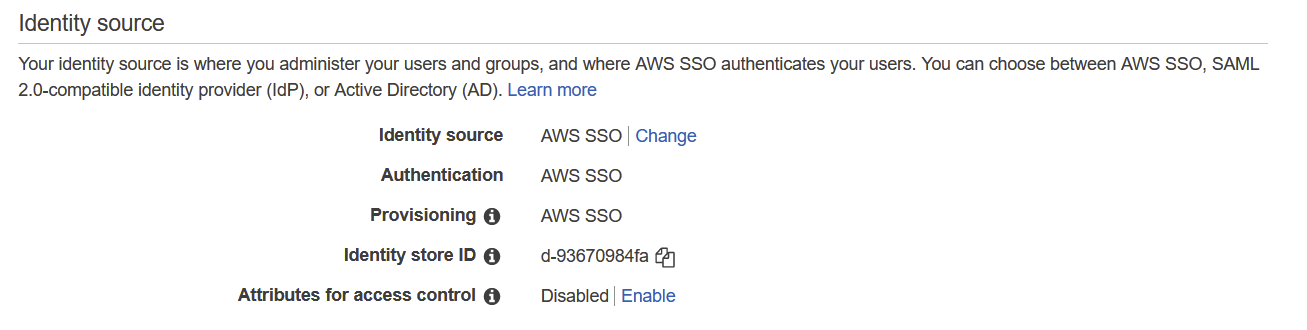
Log in into the AWS Organizations management account for and select “AWS Single Sign On”
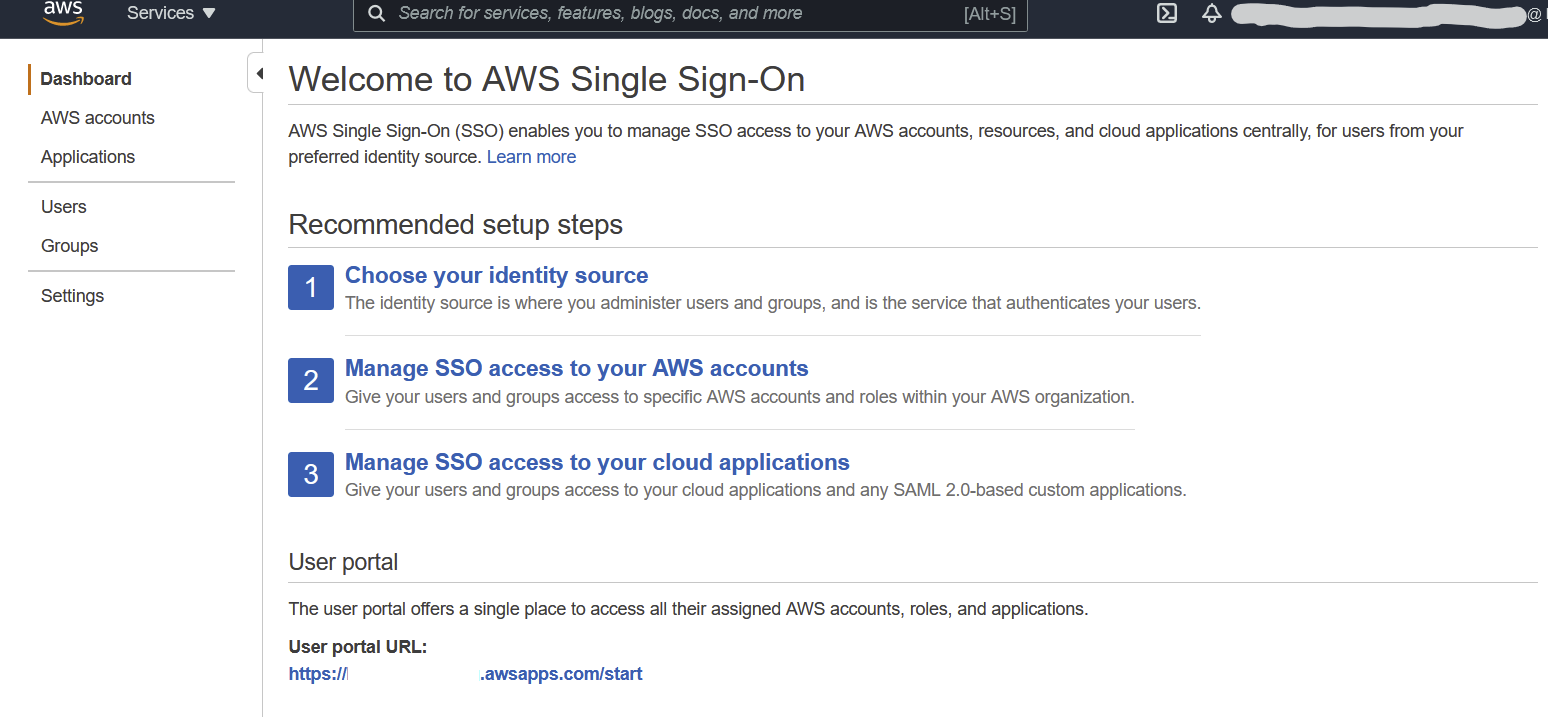
If you previously configured AWS SSO you can change your identity source or configure a new one on the “Settings” page.
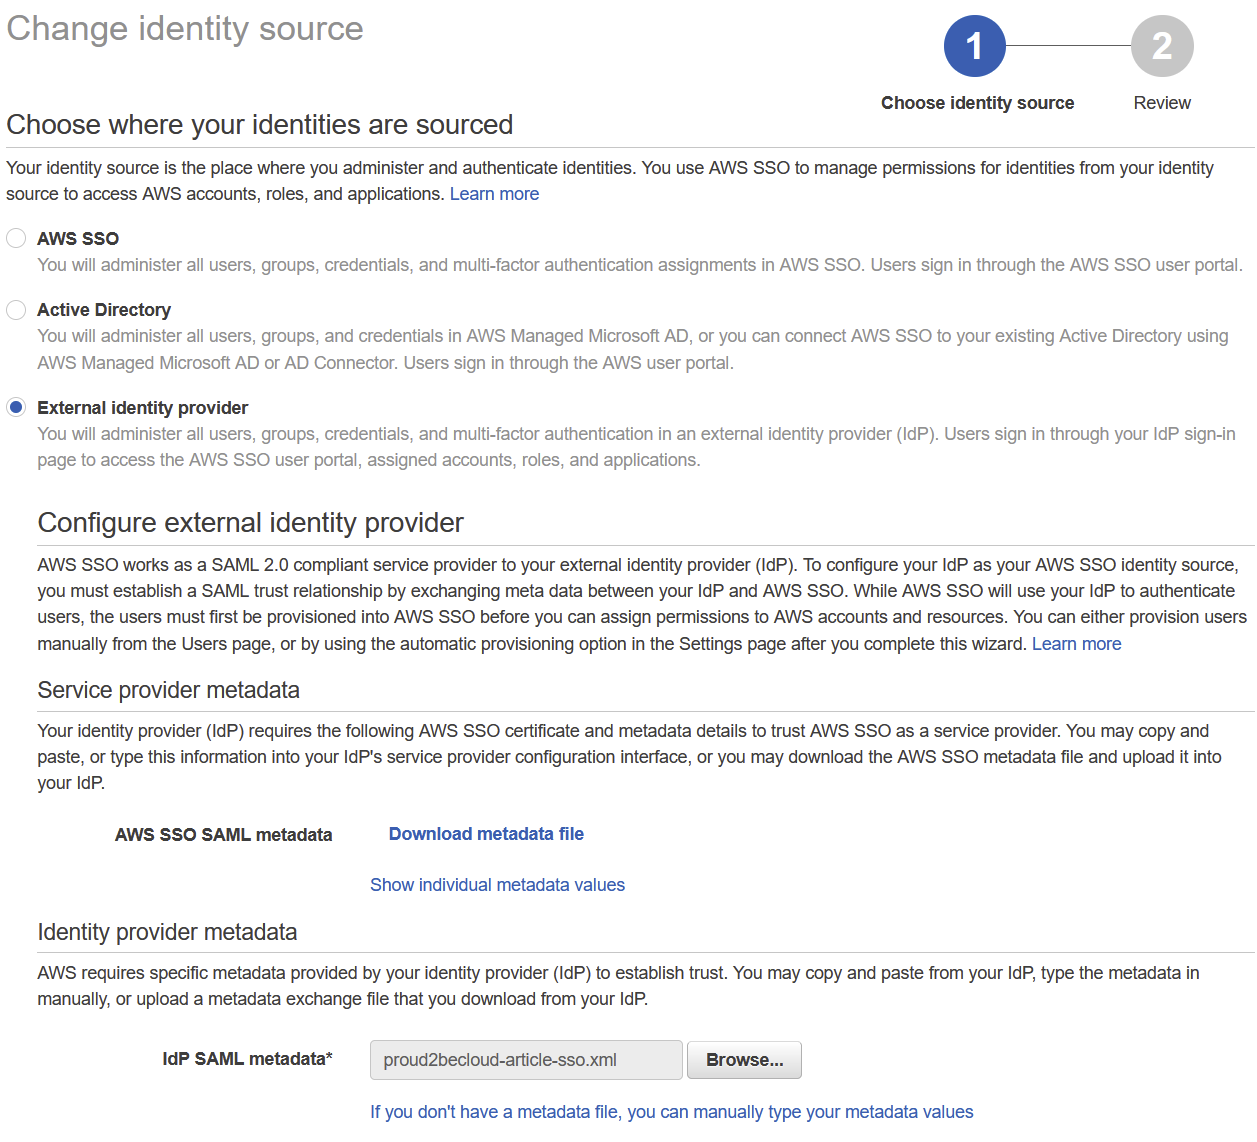
Select “External identity provider”, download the metadata file and, as previously, store it in a secure place. Upload the metadata file you downloaded from the Azure SAML application page
Go back to the Azure Active Directory Administration Console and click on “upload metadata file”

Select the file downloaded from the AWS Console and proceed.
We just exchanged the required configuration information to federate Azure Active Directory users with AWS SSO.
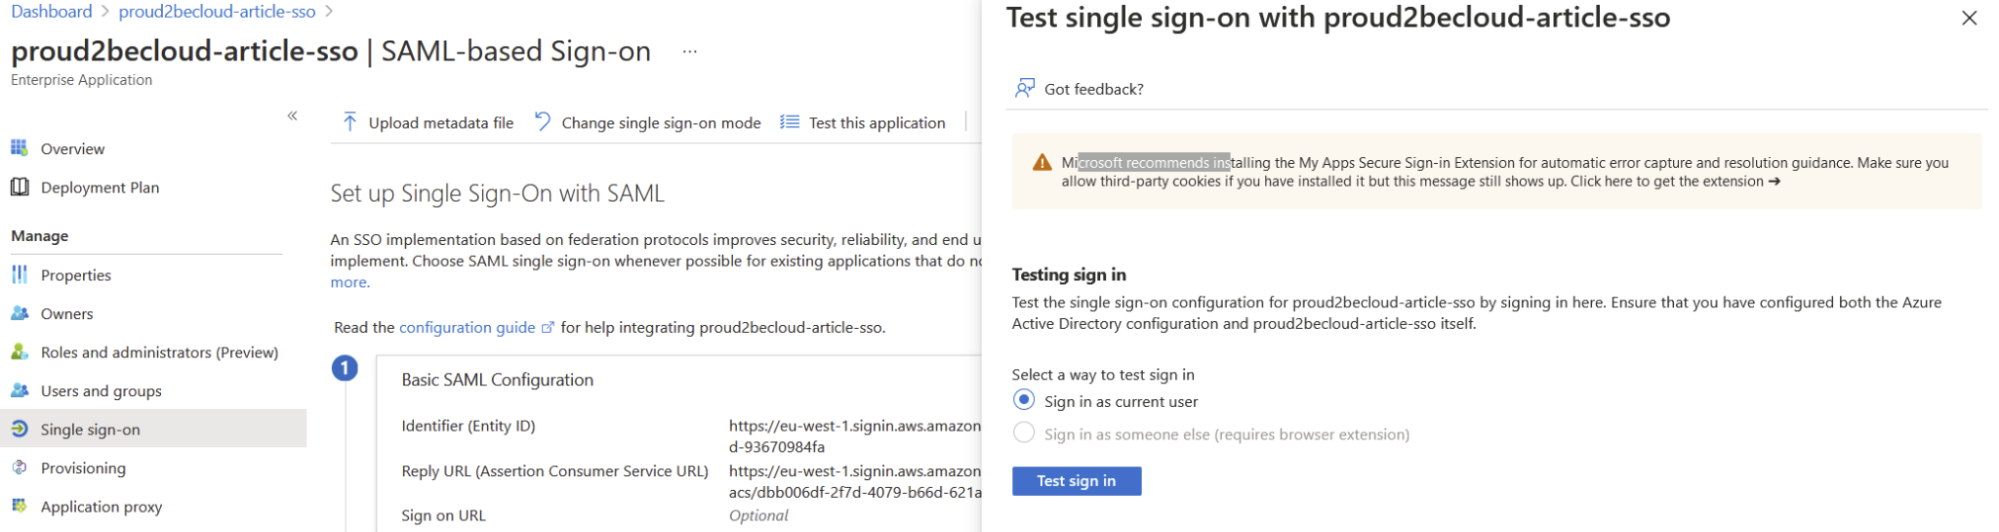
Back on the Azure Console you can try the application, you should now be able to login with your current Azure Active Directory credentials.
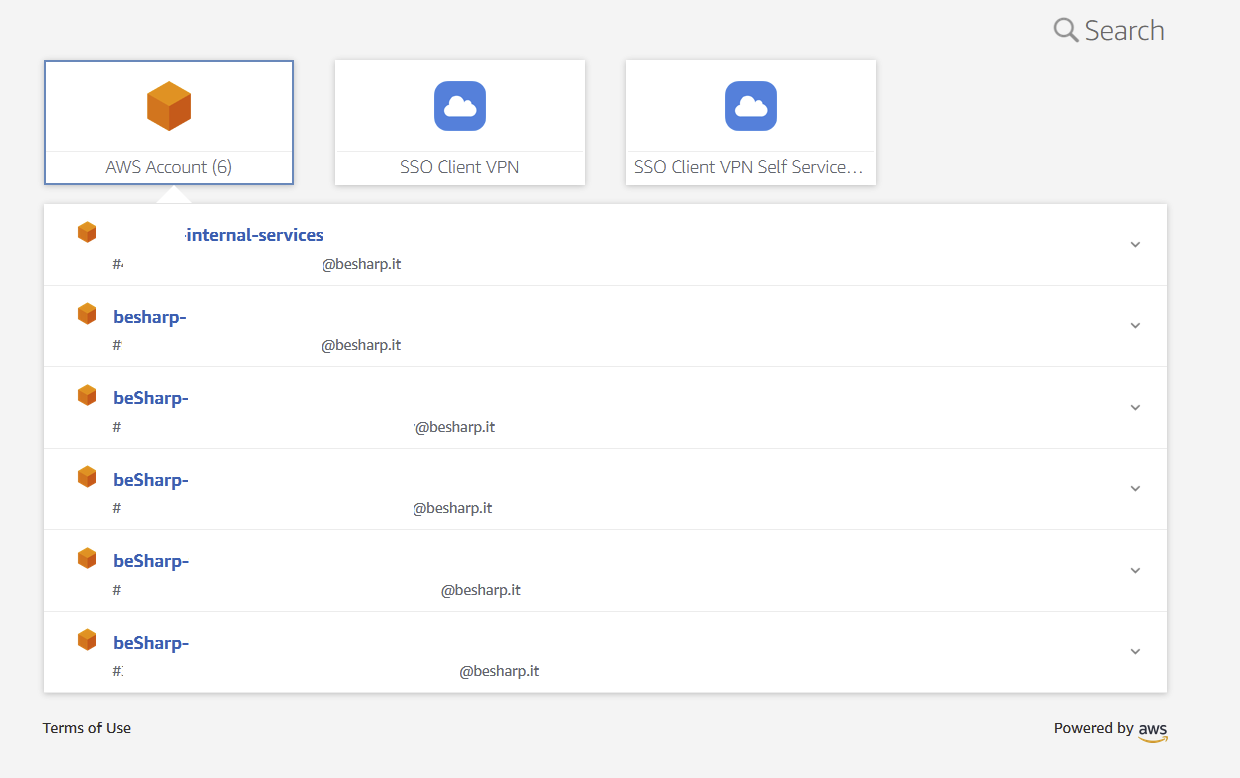
If you assign AWS accounts and different applications to your users you should be able to see them
You can also enable auto-provisioning for users and enable selected groups to access your AWS accounts.
We’ll use a different AWS account (internal-services) to configure Amazon Connect. With SSO and Organizations we can enable fine-grained access to different teams and isolate duties.
On the internal-service account search for “Amazon Connect” and click on “Create new instance”.
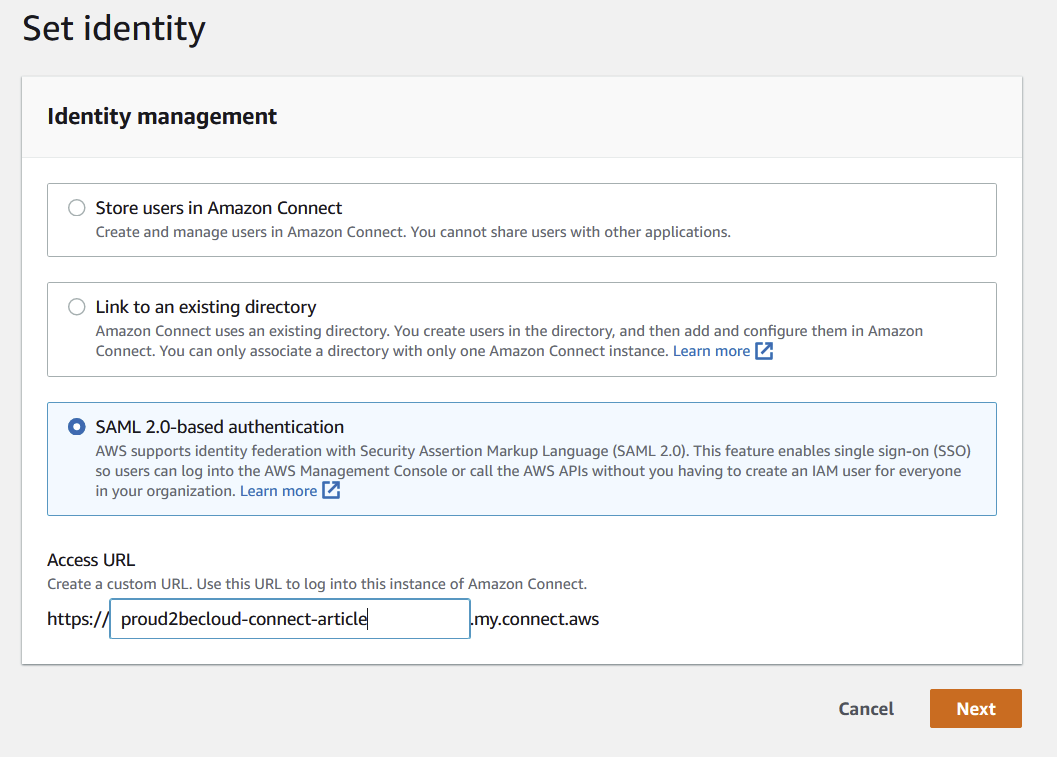
Select “SAML 2.0-based authentication” for identity management and assign a name to your instance.
Once you set an authentication mechanism in Amazon Connect you can’t change it.
Continue with the configuration wizard steps with your preferences.
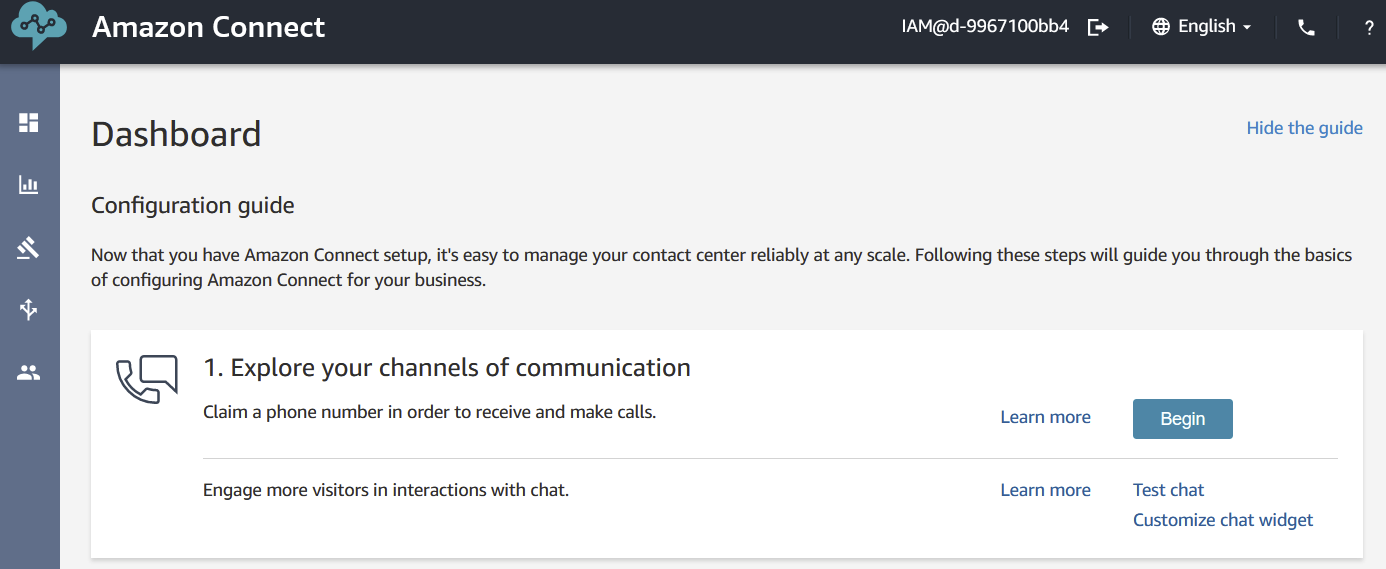
In a matter of minutes, your amazon connect instance should be ready.

Please note: since Connect doesn’t support user auto-provisioning you’ll need to create a user with the same username you defined in Azure Active Directory
On the management account go back on the AWS SSO Console click on “Applications” and “Add a new Application”, search for “Amazon Connect”
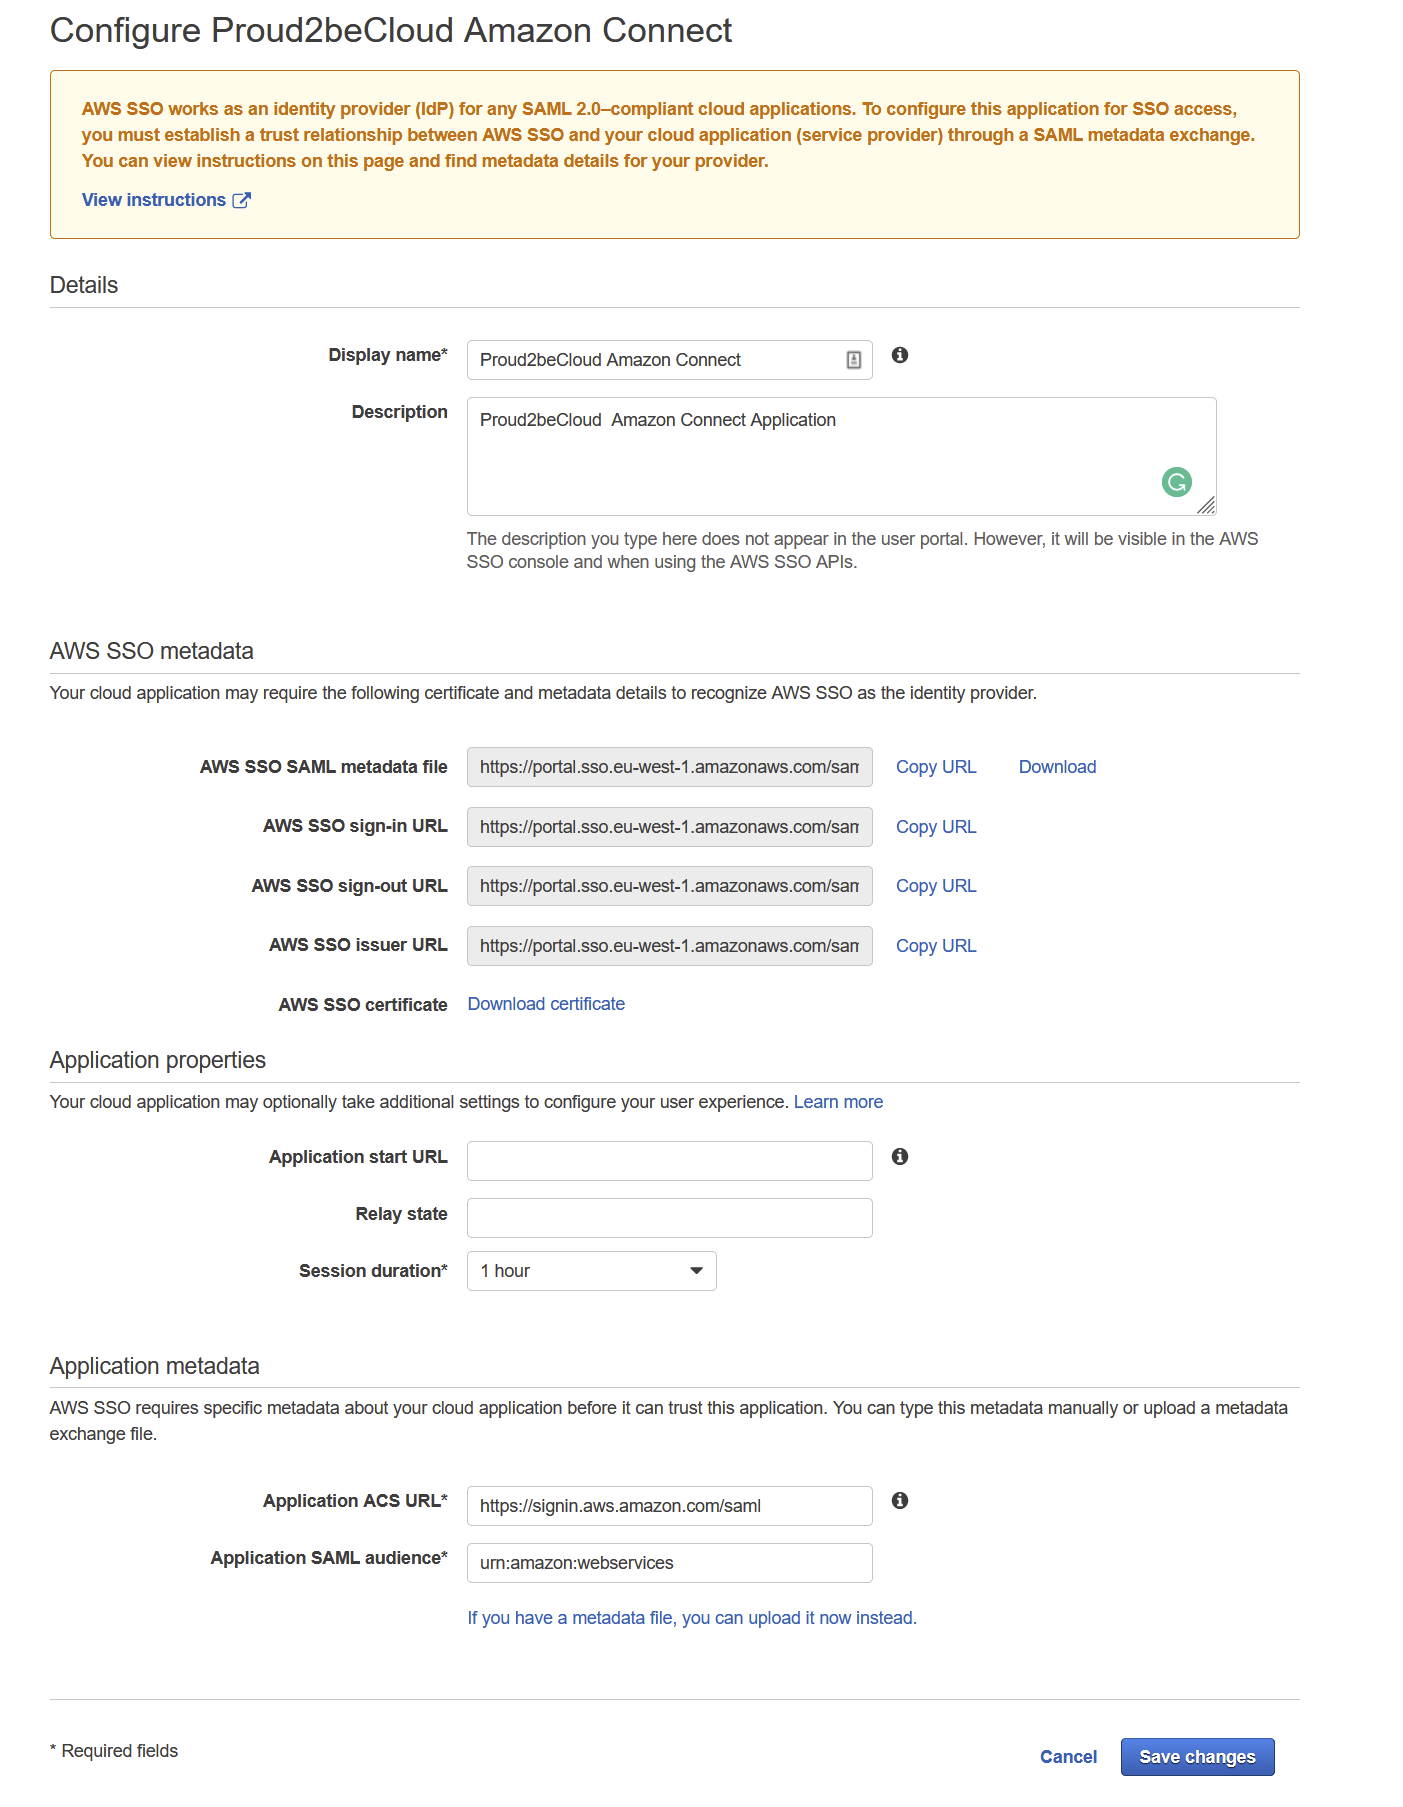
Give your application a name and, once again, download the metadata file.
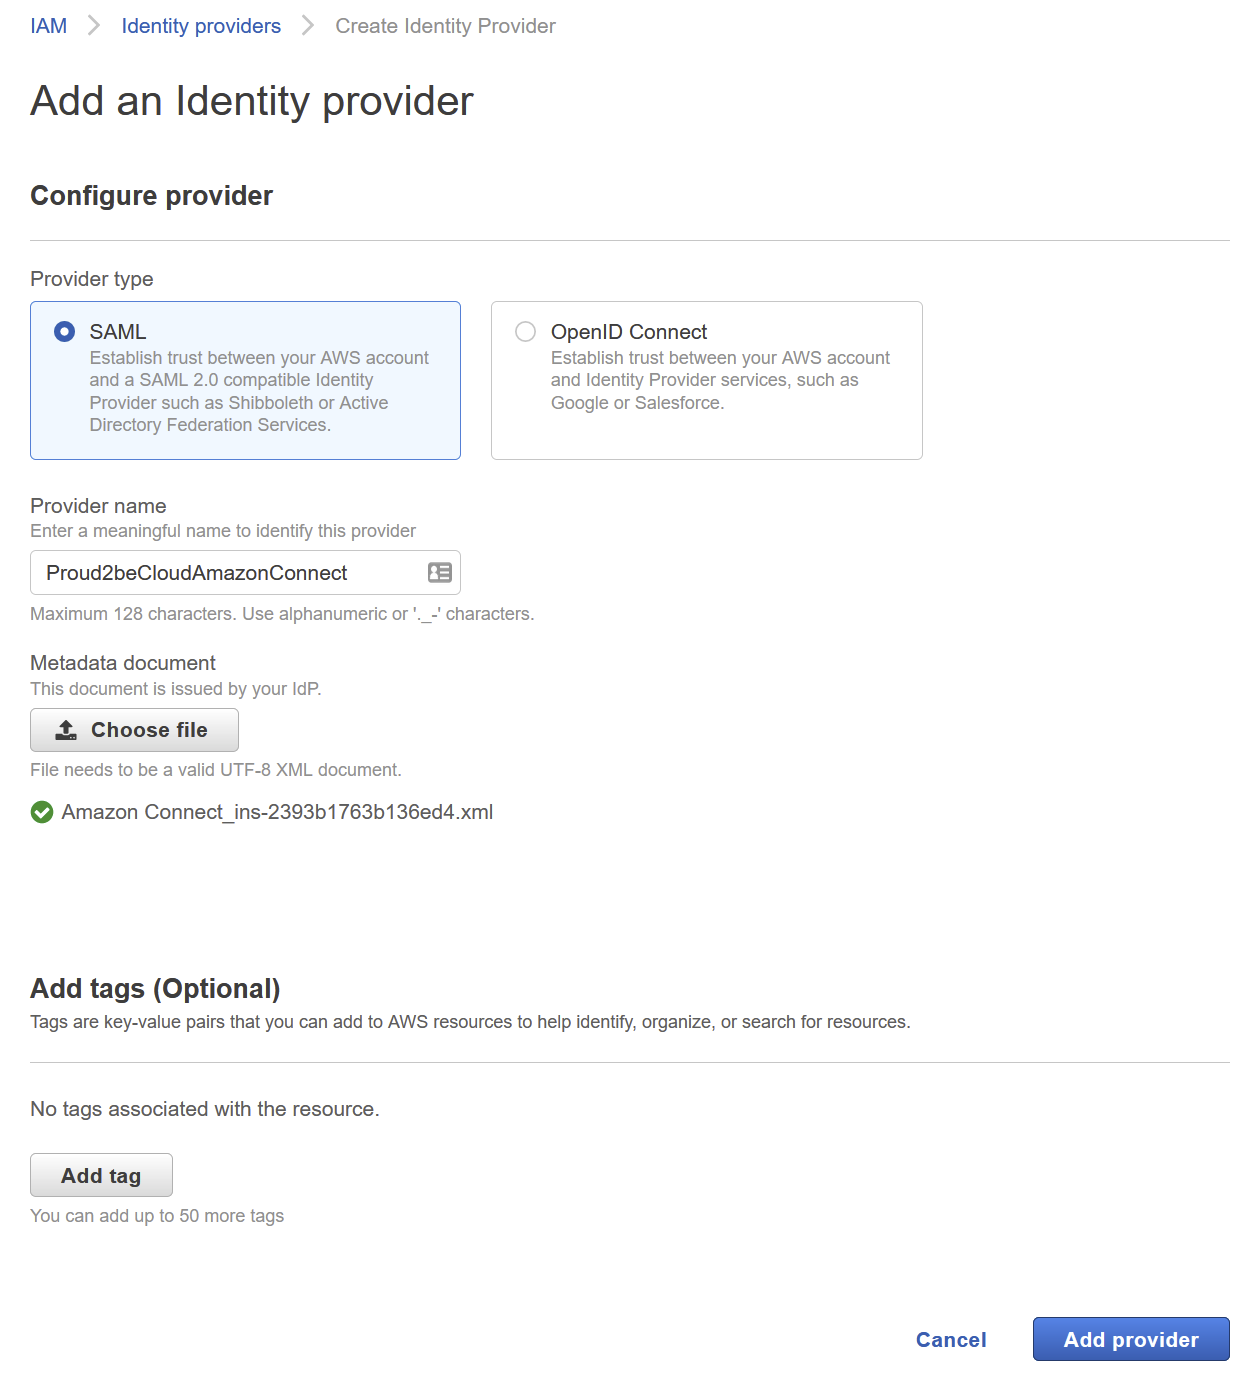
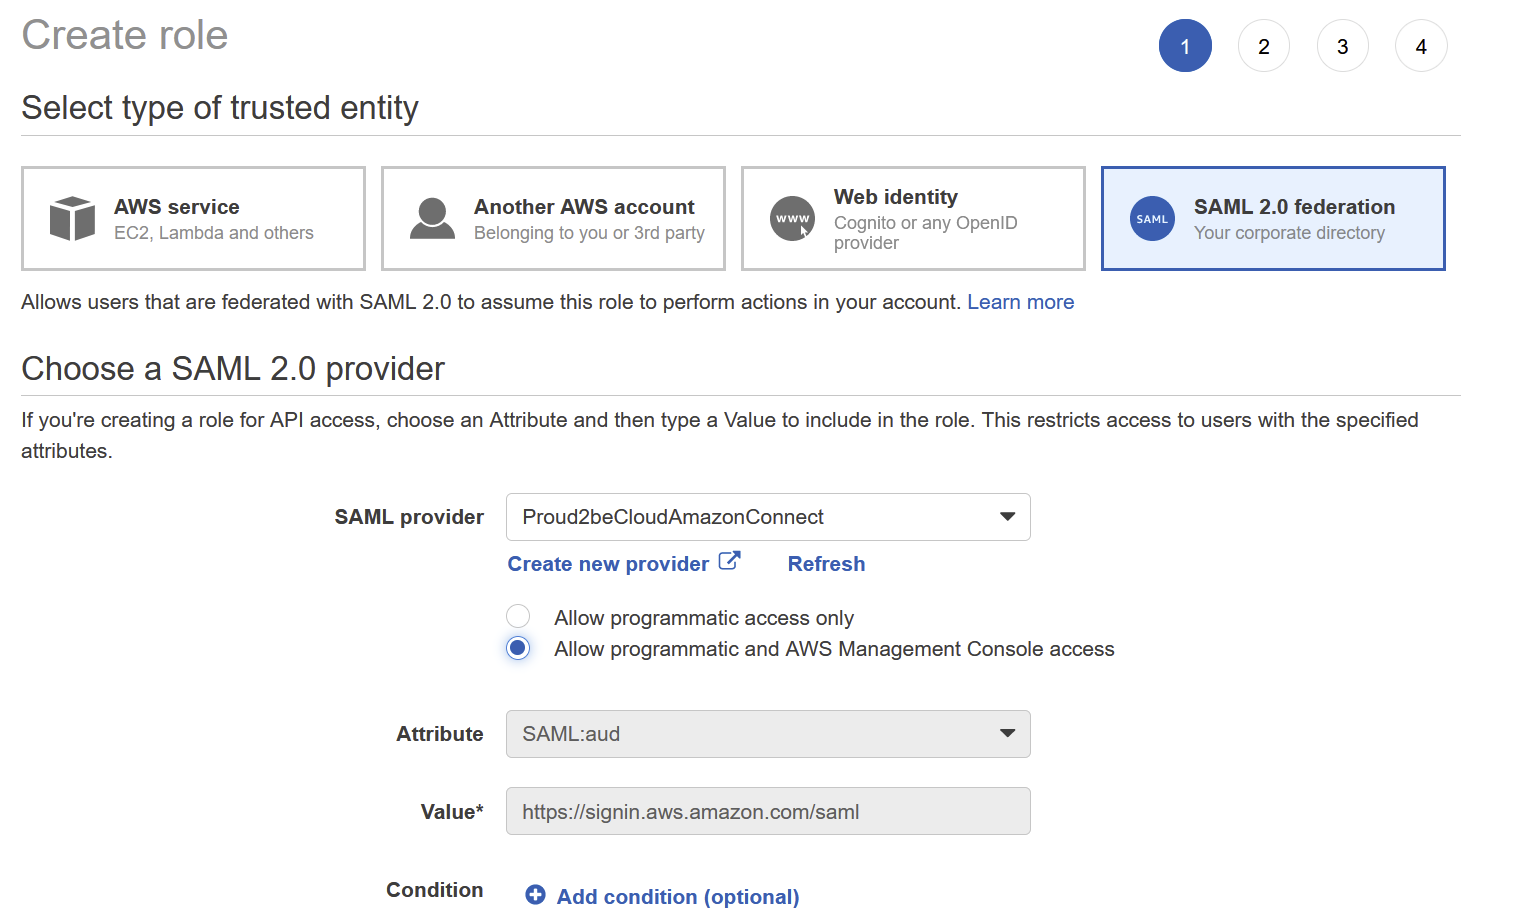
On the internal-services account, go to IAM and go in the “Identity Providers” section, click on “Add provider” and upload the metadata file
Once the identity provider has been created we’ll need to setup the necessary roles and policies to let SSO users access the service
On the internal-services account go to IAM -> Roles and create a new Role. Select “SAML 2.0 federation” for the type of trusted identity and choose the identity provider you have just created.
Create a new policy to let the role get a “Federation Token” from the Amazon Connect instance, use this json template:
{
	"Version": "2012-10-17",
	"Statement": [
    	{
        	"Sid": "Statement1",
        	"Effect": "Allow",
        	"Action": "connect:GetFederationToken",
        	"Resource": [
            	"arn:aws:connect:region:Account-id:instance/amazonconnectintanceid/user/${aws:userid}"
        	]
    	}
	]
}
You can find the instance id by clicking on the connect instance and copying the last part of the “Instance ARN” field, use the internal-services accountid and the connect region for the remaining fields:

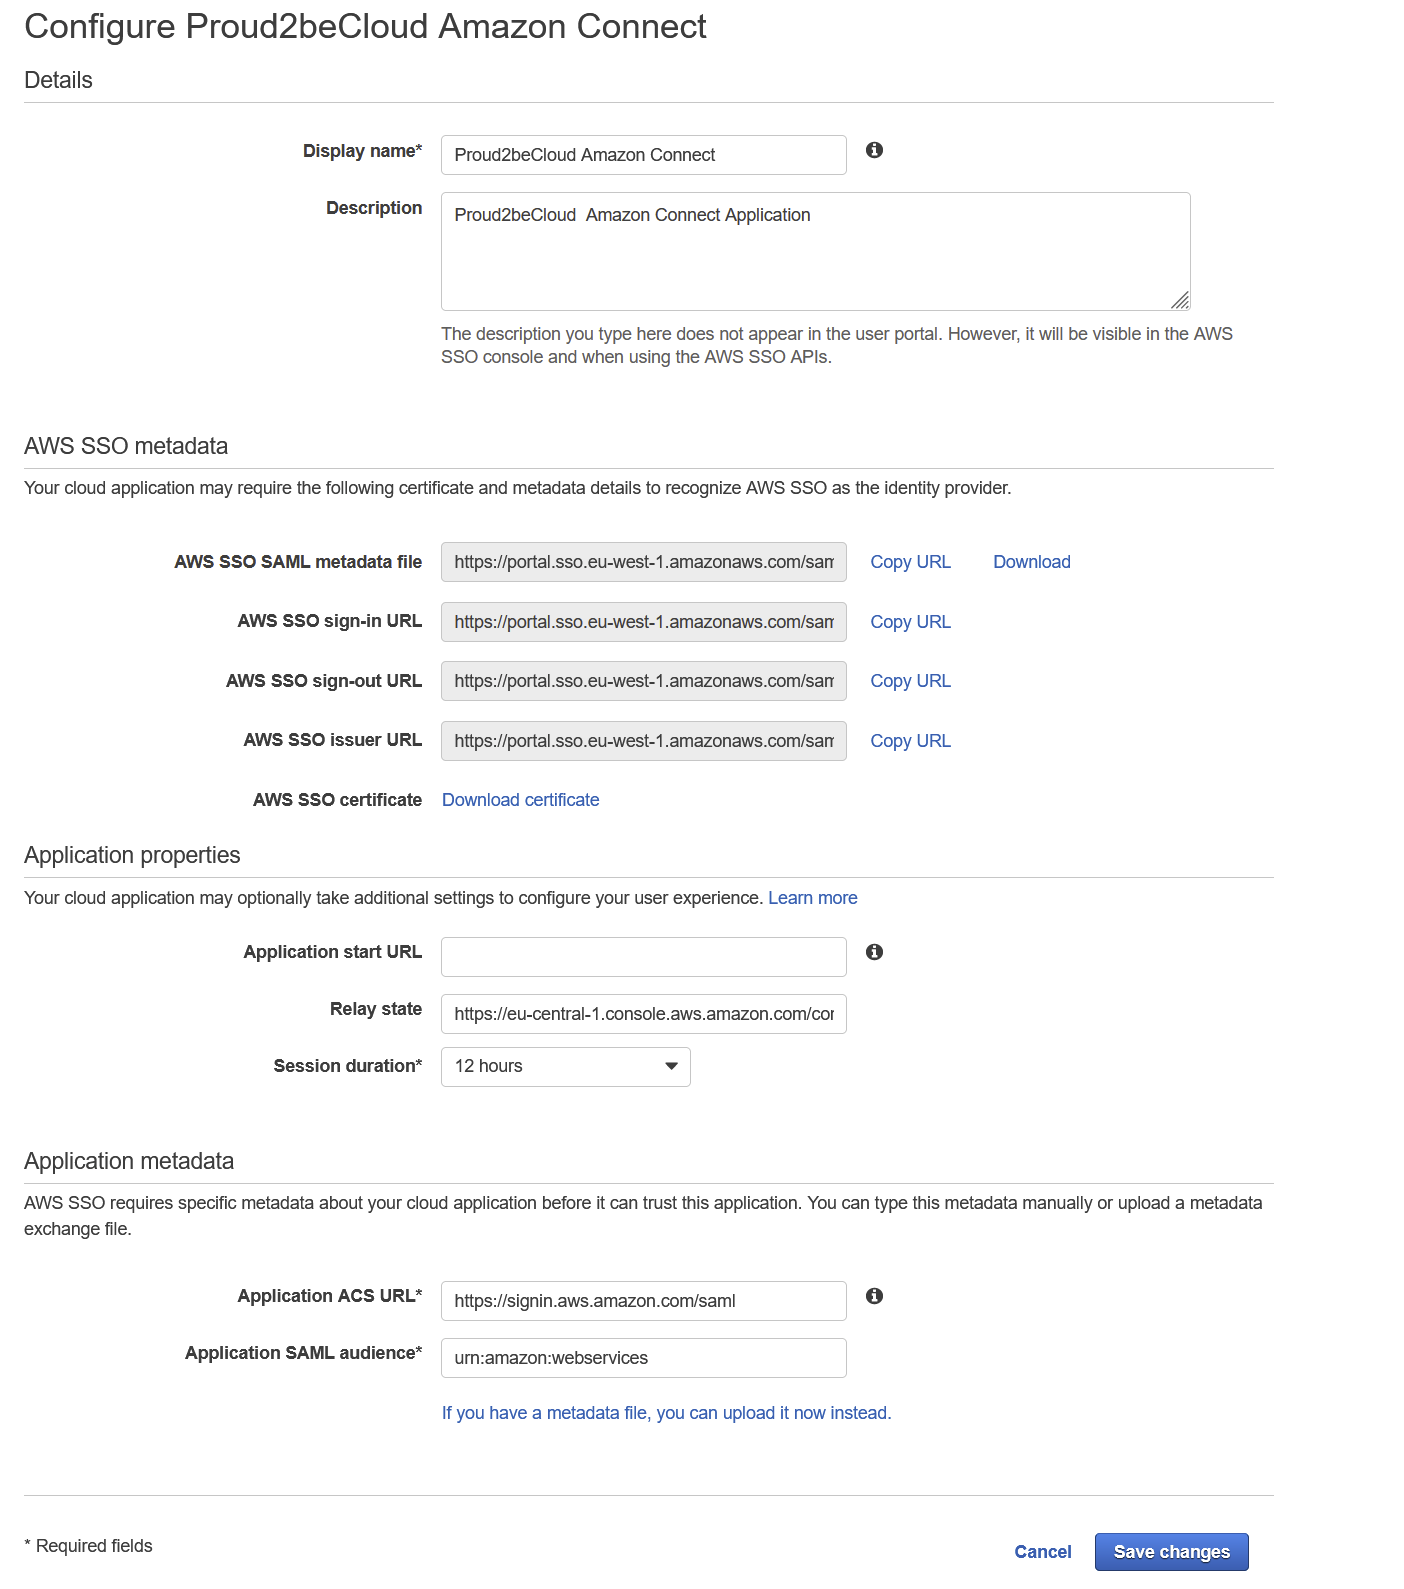
Once the appropriate role and policy have been created we can go back to the AWS SSO Console on the management account to modify the Connect application to finish the configuration.
Edit the configuration, leave the “Application start URL” field blank, for “Relay state” use:
https://region.console.aws.amazon.com/connect/federate/amazonconnectid
Go to “Attribute Mappings” and add a new mapping:
Set https://aws.amazon.com/SAML/Attributes/Role as “User attribute in the application” field and
arn:aws:iam::internal-services-account-id:saml-provider/saml-provider-name,arn:aws:iam::internal-services-account-id:role/amazon-connect-federation-role for the “Maps to this string value or user attribute in AWS SSO” field.
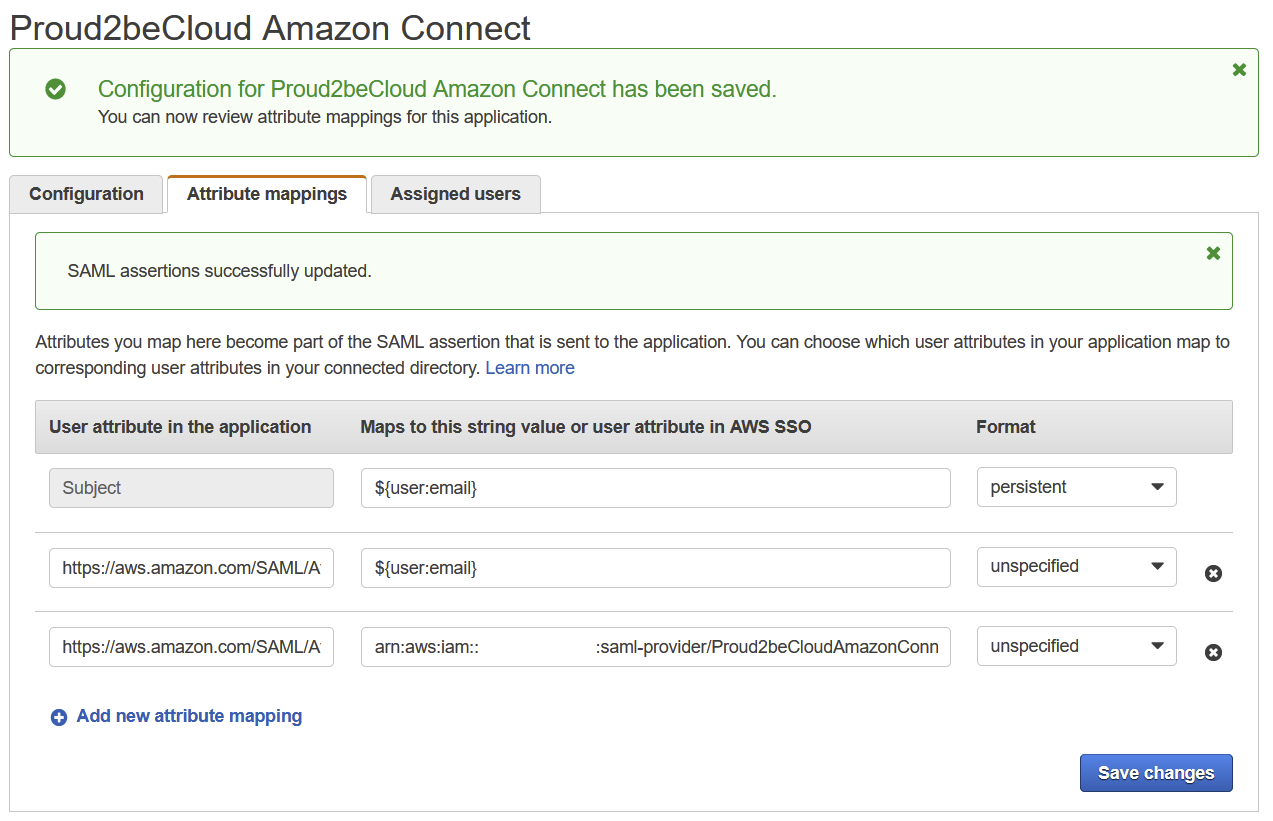
Save changes and on the “Assigned users”tab assign users to the Proud2beCloud Amazon Connect application
Go to your SSO start url (usually https://youdefinedname.awsapps.com/start/ )and login with your Azure AD/Office365 credentials, you’ll find the Amazon Connect Application.
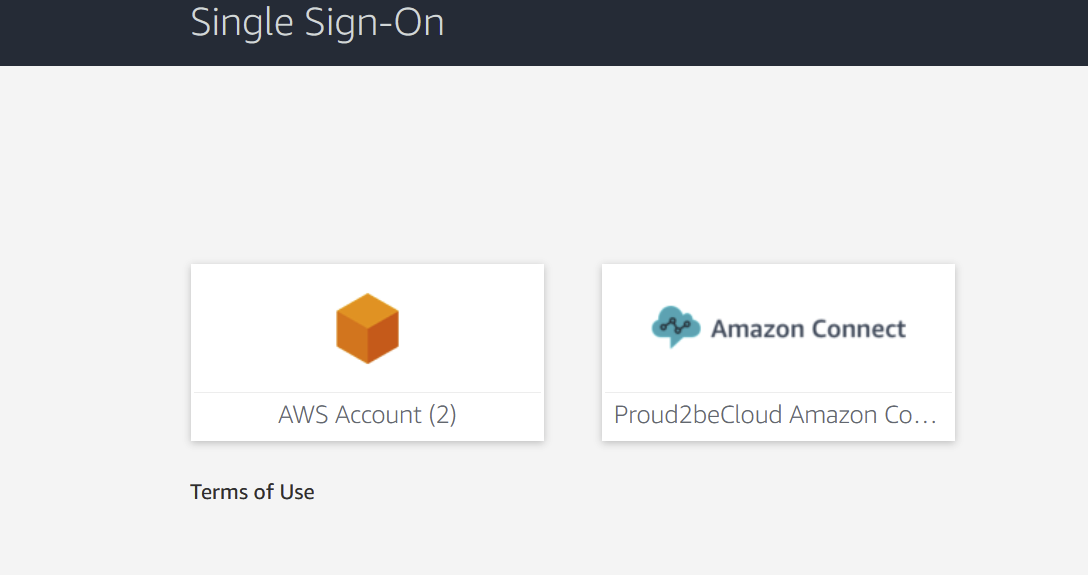
Clicking on it will take you to the Amazon Connect dashboard with your credentials.

That’s it! Your Amazon Connect instance now uses Azure AD to validate user credentials
A cross-account scenario isn’t always easy to troubleshoot but with this tutorial, you should be able to get it running in a couple of minutes
Now you can configure Amazon Connect, if you are not able to access your instance using SSO check the IDP provider, configured role, policies, and mappings.
Have you faced any particular use case? Feel free to leave your thoughts in the comments!
And see you again in 14 days on Proud2beCloud!